Case Cx225 Tier 3 Excavator Operators Manual
DESCRIPTION:
Read this manual carefully, paying particular attention to the instructions concerning safety, operation and maintenance so as to avoid the risk of injury while operating or servicing the machine. Use this manual as a guide. Your machine will remain a reliable working tool provided it is kept in good working condition and serviced properly. The standard attachments and equipment available for use with this machine are intended for general earthmoving purposes, material rehandling, boring.
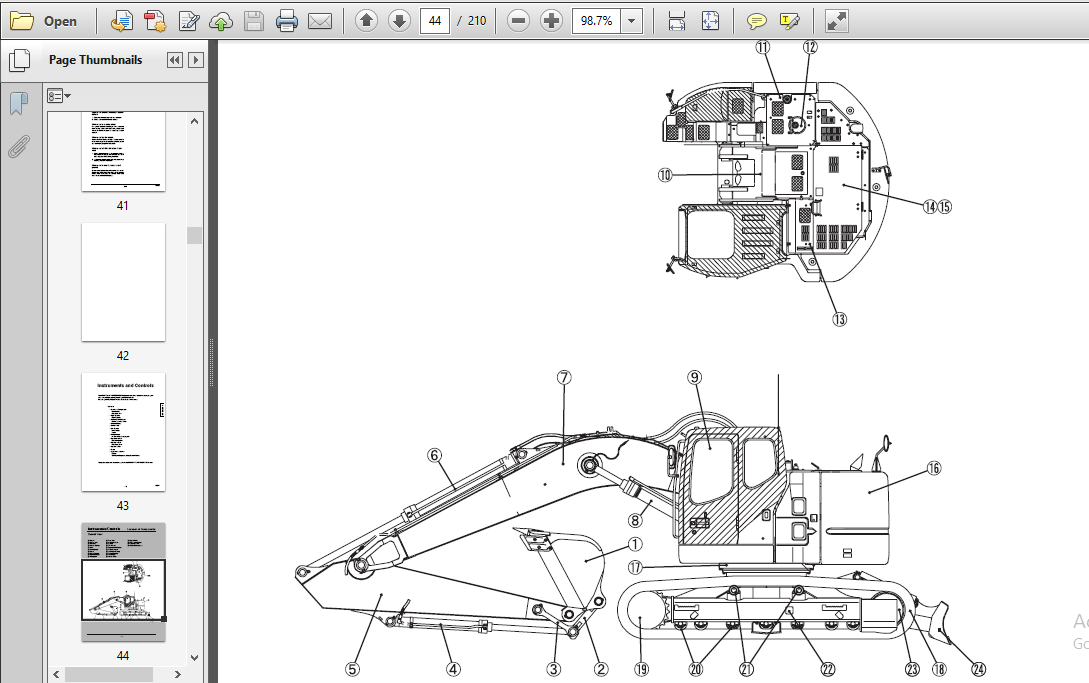
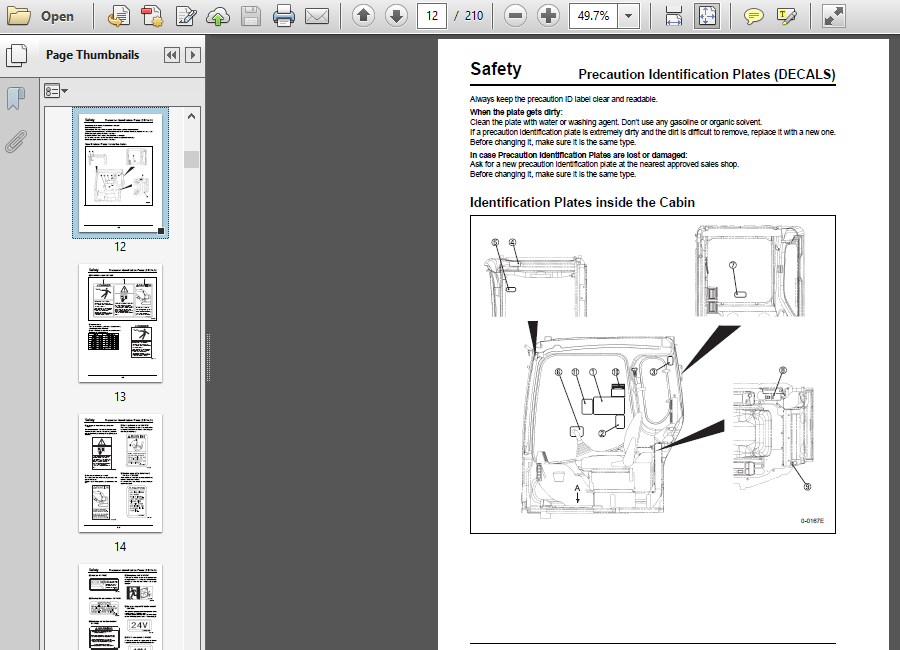
SCREENSHOT OF THE MANUAL:


TABLE OF CONTENTS:
- Case Cx225 Tier 3 Excavator Operators Manual
To the Owner 0-1
Safety Labels 0-2
For Safe Driving 0-3
Safety Section 0-7
Precaution Identification Plates (DECALS) 0-8
Identification Plates inside the Cabin 0-8
Outside Identification Plate 0-13
Precaution Identification Plates on Parts (Examples)
0-17
Prior to Operation 0-18
Confirmation of Safety items 0-20
During Operation 0-23
While Traveling 0-27
After Operating 0-28
While Transporting 0-29
Before Regular Inspection & Maintenance 0-30
Inspection and Maintenance 0-31
Instruments and Controls 1-0
Location of Components 1-1
Overall View 1-1
Operator’s Cab 1-2
Right Console 1-4
Right Console 1-4
Monitor & Switch Panel 1-5
Monitor & Switch Panel 1-5
Moniter Display 1-6
Switch Panel 1-7
Left Console 1-9
Left Console 1-9
Switch 1-10
Air Conditioner 1-11
Air Conditioner (If equipped) 1-11
Explanation of device 1-13
Radio 1-13
Operation Levers 1-15
Operation Levers 1-15
Operator’s Seat 1-18
Operator’s Seat 1-18
Operator’s Cab 1-20
Fuses 1-22
Fuses 1-22
Explanation of device 1-23
Battery 1-23
Starting the Engine by Using Booster Cables 1-24
Operating Instructions 2-0
Operation of New Machine 2-1
Using a New Machine 2-1
Daily Inspections 2-2
Daily Inspections 2-2
Starting and Stopping the Engine 2-4
Inspections before Starting the Engine 2-4
Starting the Engine 2-5
Inspections after Starting the Engine 2-6
Stopping the Engine (Normal Operation) 2-7
Warm-up Operation 2-8
Warm-up Operation 2-8
Operations (Traveling) 2-10
Operations (Swing) 2-19
Swing Operation 2-19
Operations (Attachment) 2-20
Operations (Attachment) 2-20
Operations 2-21
Blade Operation 2-21
Characteristics of Hydraulic Excavator 2-21
Cautions for operations 2-22
Cautions for Interference 2-22
Operating Instructions (Cautions) 2-24
Operating Instructions (Procedures) 2-25
Bucket: Turning Over and Replacement 2-27
Bucket: Turning Over and Replacement 2-27
On Completion of Daily Operations 2-29
On Completion of Daily Operations 2-29
Operating in Cold Climates 2-31
Operating under Extreme Conditions 2-32
Transportation 2-33
Loading and Unloading 2-33
Switch settings during loading and unloading 2-33
Transportation 2-33
Storing 2-37
Inspections and Maintenance 3-0
General Cautions 3-1
Periodic Maintenance Check List 3-2
Daily Inspections (Prior to Operation) 3-2
Periodic Maintenance Check List 3-3
Fuel / Lubricants for Different Ambient Temperature
Settings 3-4
Genuine CASE Company LLC Parts and Elements 3-5
Disposable Items 3-6
Grease / Oil and Elements 3-7
Inspection Prior to Operation 3-9
Inspections Prior to Operation 3-9
Greasing Attachments 3-13
Greasing Front Attachment Pins 3-13
Fuel System 3-15
Fuel 3-15
Fuel Refilling and Fuel Level Checking 3-18
Drainage of Water and Sediments in the Fuel Tank
3-18
Draining Water from the Pre Fuel Filter 3-19
Pre Fuel Filter Replacement 3-20
Draining Water from the Fuel Filter (Main) 3-21
Fuel Filter (Main) Replacement 3-21
Engine 3-23
Engine Oil Replacement 3-23
Engine Oil Filter Replacement 3-23
Cooling System 3-25
Inspecting and Refilling Coolant 3-25
Replacing the Coolant 3-26
Cleaning and Inspecting the Radiator Net and Fin
Cleaning and Replacing the Air Cleaner (double elements)
Inspection and Adjustment of Fan Belt 3-30
0-6-2
Table of Contents
Bolt Torque 3-31
Bolt and Nut Torque 3-31
Hydraulic Oil 3-34
Hydraulic Oil Level Inspection 3-34
Refilling Hydraulic Oil 3-34
Draining Water and Sediment from the Hydraulic Oil
Tank 3-35
Hydraulic Oil Management 3-36
Hydraulic Oil Replacement 3-36
Bleeding Air from the Hydraulic Components 3-37
Air Bleeding Procedures 3-37
Air Bleeding from Hydraulic Pump 3-37
Air Bleeding from Cylinder 3-38
Air Bleeding from Swing Motor 3-38
Cleaning and Replacing Suction Filter 3-39
Replacing Return Filter 3-39
Replacing Air Breather Element 3-40
Replacing Pilot Oil Filter Element 3-40
Replacement Intervals for Hydraulic Oil and Filters when
Using Breaker 3-41
Checking Hoses and Lines 3-41
Battery 3-42
Battery Inspection and Charge 3-42
Upper Frame 3-44
Turntable Bearing Greasing 3-44
Greasing Swing Ring Gear 3-44
Swing Unit 3-45
Oil Level Inspection and Refilling of Swing Reduction
Gear 3-45
Oil Replacement for Swing Reduction Gear 3-45
Greasing Swing Reduction Gear 3-46
Travel Unit 3-47
Travel Reduction Gear 3-47
Oil Level Inspection and Refilling of Travel Reduction
Gear 3-47
Oil Replacement for Travel Reduction Gear 3-47
Inspecting Upper/Lower Take-up Roller (Idler Wheel)
3-48
Inspection and Tightening of Shoe Plate 3-48
Cleaning Crawler 3-48
Inspection and Adjustment of Track Shoe Tension
3-49
Bucket 3-50
Replacing Bucket Teeth: Standard type (Length Pin
Type) 3-50
Replacing Bucket Tooth: Standard type (Side pin type)
3-52
Replacing Bucket Teeth: Heavy Digging Type 3-53
Adjustment of Bucket Backlash 3-54
Air Conditioner 3-55
Inspection and Care of Air Conditioner (If Equipped)
3-55
Routine Replacement Safety Parts 3-59
Troubleshooting 3-60
Contacting Us 3-65
Specifications 4-0
Conversion Factors 4-1
CONVERSION FACTORS 4-1
VIDEO PREVIEW:
PLEASE NOTE:
⦁ This is not a physical manual but a digital manual – meaning no physical copy will be couriered to you. The manual can be yours in the next 2 mins as once you make the payment, you will be directed to the download page IMMEDIATELY.
⦁ This is the same manual used by the dealers inorder to diagnose your vehicle of its faults.
⦁ Require some other service manual or have any queries: please WRITE to us at [email protected]


