

Volkswagen Golf 2015, Golf Variant 2015 Repair Manual – PDF DOWNLOAD
FILE DETAILS:
Volkswagen Golf 2015, Golf Variant 2015 Repair Manual – PDF DOWNLOAD
Language : English
Pages : 320
Downloadable : Yes
File Type : PDF
Size: 29.1 MB
IMAGES PREVIEW OF THE MANUAL:
DESCRIPTION:
Volkswagen Golf 2015, Golf Variant 2015 Repair Manual – PDF DOWNLOAD
- The Volkswagen Golf 2015 Golf Variant 2015 Repair Manual is a comprehensive guide to the maintenance and repair of the Volkswagen Golf and Golf Variant, compact cars produced by the German automaker Volkswagen. This manual provides detailed instructions and procedures for performing routine maintenance, as well as more complex repair tasks, on the Volkswagen Golf and Golf Variant.
- The Volkswagen Golf 2015 Golf Variant 2015 Repair Manual covers the Volkswagen Golf and Golf Variant models produced in 2015. It provides information on the mechanical components of the vehicle, including the engine, transmission, suspension, brakes, and much more. The manual also includes detailed procedures for performing routine maintenance tasks, such as oil changes, tire rotations, and brake inspections.
- In addition to providing information on routine maintenance and repair tasks, the Volkswagen Golf 2015 Golf Variant 2015 Repair Manual also includes troubleshooting guides that can help technicians and DIY enthusiasts diagnose and resolve mechanical problems in the Volkswagen Golf and Golf Variant. The manual provides step-by-step procedures for diagnosing problems with the mechanical components of the vehicle, and provides recommendations for repairs and maintenance tasks.
- The Volkswagen Golf 2015 Golf Variant 2015 Repair Manual includes a wealth of technical information and diagrams that provide a clear understanding of the mechanical components of the Volkswagen Golf and Golf Variant, making it easier for technicians and DIY enthusiasts to diagnose and resolve mechanical problems. The manual also includes a glossary of technical terms and a reference section that provides information on tools and equipment needed for maintenance and repair tasks.
- The Volkswagen Golf 2015 Golf Variant 2015 Repair Manual is an essential resource for anyone working on the maintenance and repair of a Volkswagen Golf or Golf Variant. Whether a professional technician or a DIY enthusiast, this manual provides the information and guidance needed to ensure that the mechanical components of the Volkswagen Golf and Golf Variant are maintained and repaired correctly, and that mechanical problems are diagnosed and resolved quickly and efficiently.
TABLE OF CONTENTS:
Volkswagen Golf 2015, Golf Variant 2015 Repair Manual – PDF DOWNLOAD
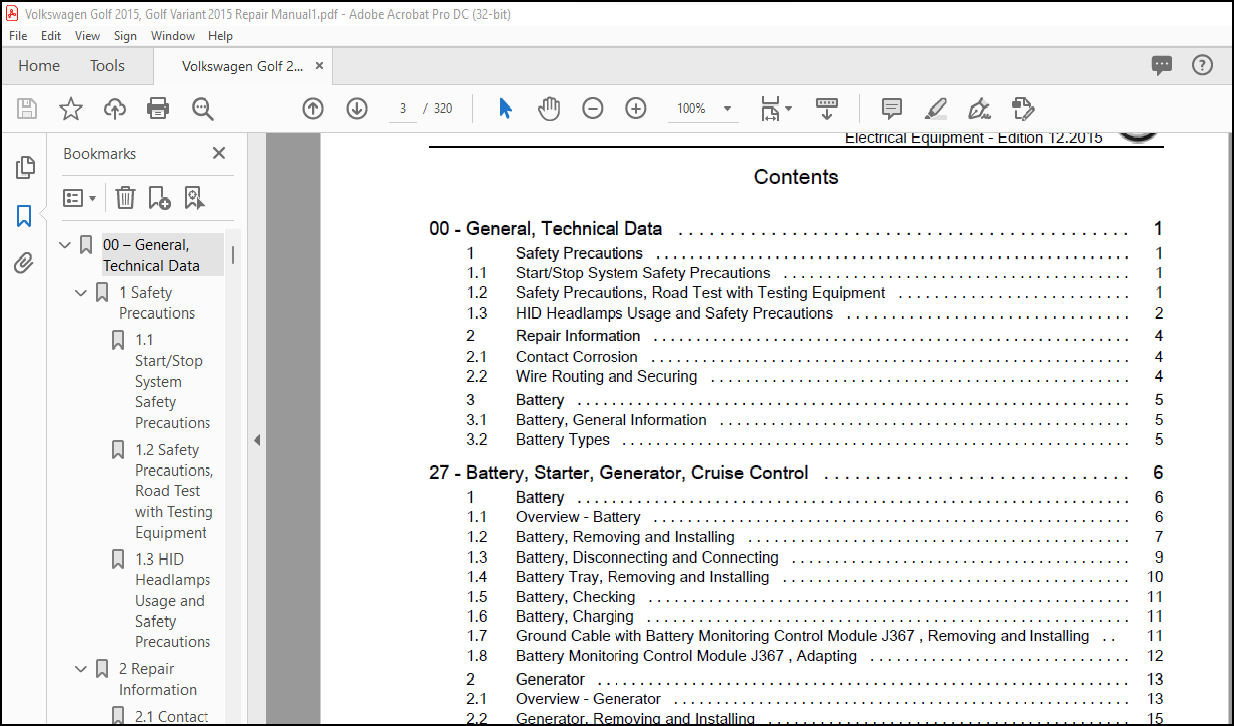
00 – General, Technical Data…………………………………………………………………………………………………….. 9
1 Safety Precautions………………………………………………………………………………………………………… 9
1.1 Start/Stop System Safety Precautions…………………………………………………………………………………… 9
1.2 Safety Precautions, Road Test with Testing Equipment…………………………………………………………………….. 9
1.3 HID Headlamps Usage and Safety Precautions……………………………………………………………………………… 10
2 Repair Information………………………………………………………………………………………………………… 12
2.1 Contact Corrosion……………………………………………………………………………………………………. 12
2.2 Wire Routing and Securing…………………………………………………………………………………………….. 12
3 Battery………………………………………………………………………………………………………………….. 13
3.1 Battery, General Information………………………………………………………………………………………….. 13
3.2 Battery Types……………………………………………………………………………………………………….. 13
27 – Battery, Starter, Generator, Cruise Control…………………………………………………………………………………… 14
1 Battery………………………………………………………………………………………………………………….. 14
1.1 Overview – Battery…………………………………………………………………………………………………… 14
1.2 Battery, Removing and Installing………………………………………………………………………………………. 15
1.3 Battery, Disconnecting and Connecting………………………………………………………………………………….. 17
1.4 Battery Tray, Removing and Installing………………………………………………………………………………….. 18
1.5 Battery, Checking……………………………………………………………………………………………………. 19
1.6 Battery, Charging……………………………………………………………………………………………………. 19
1.7 Ground Cable with Battery Monitoring Control Module -J367-, Removing and Installing…………………………………………. 19
1.8 Battery Monitoring Control Module -J367-, Adapting………………………………………………………………………. 20
2 Generator………………………………………………………………………………………………………………… 21
2.1 Overview – Generator…………………………………………………………………………………………………. 21
2.1.1 Overview – Generator without Bushings…………………………………………………………………………….. 21
2.1.2 Overview – Generator with Bushings……………………………………………………………………………….. 22
2.2 Generator, Removing and Installing…………………………………………………………………………………….. 23
2.2.1 Generator, Removing and Installing, 1.4L TSI Engine………………………………………………………………… 23
2.2.2 Generator, Removing and Installing, Vehicles with 2.0L TSI Engine……………………………………………………. 24
2.2.3 Generator, Removing and Installing, Vehicles with 1.8L TSI-Engine……………………………………………………. 26
2.2.4 Generator, Removing and Installing, Vehicles with 1.6L MPI Engine……………………………………………………. 27
2.2.5 Generator, Removing and Installing, Vehicles with TDI Engine………………………………………………………… 28
2.3 Generator, Checking………………………………………………………………………………………………….. 30
2.4 Ribbed Belt Pulley, Removing and Installing…………………………………………………………………………….. 30
2.4.1 Ribbed Belt Pulley without Freewheel, Removing and Installing……………………………………………………….. 30
2.4.2 Ribbed Belt Pulley with Freewheel, Removing and Installing, Bosch……………………………………………………. 30
2.4.3 Ribbed Belt Pulley with Freewheel, Removing and Installing, Valeo……………………………………………………. 32
2.4.4 Decoupling Belt Pulley with Freewheel, Removing and Installing………………………………………………………. 33
2.5 Voltage Regulator, Removing and Installing……………………………………………………………………………… 35
2.5.1 Voltage Regulator, Removing and Installing, Bosch………………………………………………………………….. 35
2.5.2 Voltage Regulator, Removing and Installing, Valeo………………………………………………………………….. 36
3 Starter………………………………………………………………………………………………………………….. 38
3.1 Overview – Starter…………………………………………………………………………………………………… 38
3.1.1 Overview – Starter, Vehicles with Manual Transmission………………………………………………………………. 38
3.1.2 Overview – Starter, Vehicles with DSG Transmission DQ200–7F…………………………………………………………. 39
3.1.3 Overview – Starter, Vehicles with DSG Transmission DQ250-6F…………………………………………………………. 40
3.1.4 Overview – Starter, Vehicles with Automatic Transmission……………………………………………………………. 41
3.2 Starter, Removing and Installing………………………………………………………………………………………. 41
3.2.1 Starter, Removing and Installing, Vehicles with Manual Transmission………………………………………………….. 41
3.2.2 Starter, Removing and Installing, Vehicles with DSG Transmission DQ200–7F…………………………………………….. 43
3.2.3 Starter, Removing and Installing, Vehicles with DSG Transmission DQ250-6F…………………………………………….. 44
3.2.4 Starter, Removing and Installing, Vehicles with Automatic Transmission……………………………………………….. 45
4 Cruise Control System……………………………………………………………………………………………………… 47
5 Start/Stop System…………………………………………………………………………………………………………. 48
5.1 General Description for Start/Stop System………………………………………………………………………………. 48
5.2 Component Location Overview – Start/Stop System…………………………………………………………………………. 48
6 Adaptive Cruise Control……………………………………………………………………………………………………. 49
6.1 Component Location Overview – Adaptive Cruise Control (ACC)………………………………………………………………. 49
6.2 Control Module for Adaptive Cruise Control, Removing and Installing……………………………………………………….. 50
6.2.1 Adaptive Cruise Control Module, Removing and Installing, with Retaining Plate…………………………………………. 50
6.2.2 Adaptive Cruise Control Module, Removing and Installing, from the Retaining Plate……………………………………… 51
6.2.3 Control Module for Adaptive Cruise Control, Removing and Installing at Adapter Frame…………………………………… 52
6.3 Adaptive Cruise Control, Calibrating…………………………………………………………………………………… 53
7 Special Tools…………………………………………………………………………………………………………….. 54
90 – Instruments……………………………………………………………………………………………………………….. 57
1 Instrument Cluster………………………………………………………………………………………………………… 57
1.1 Overview – Instrument Cluster…………………………………………………………………………………………. 57
1.2 Instrument Cluster -KX2-, Removing and Installing……………………………………………………………………….. 57
2 Horn…………………………………………………………………………………………………………………….. 59
2.1 Overview – Horn……………………………………………………………………………………………………… 59
2.2 High Tone Horn -H2-/Low Tone Horn -H7-, Removing and Installing…………………………………………………………… 59
92 – Wiper/Washer Systems……………………………………………………………………………………………………….. 61
1 Windshield Wiper System……………………………………………………………………………………………………. 61
1.1 Overview – Windshield Wiper System…………………………………………………………………………………….. 61
1.1.1 Overview – Windshield Wiper System……………………………………………………………………………….. 61
1.1.2 Overview – Windshield Wiper Motor and Windshield Wiper Frame………………………………………………………… 63
1.2 Wiper, Moving Into Service Position……………………………………………………………………………………. 64
1.3 Wiper Blade, Removing and Installing…………………………………………………………………………………… 64
1.4 Windshield Wiper Arms, Removing and Installing………………………………………………………………………….. 65
1.5 Windshield Wiper Arms, Adjusting………………………………………………………………………………………. 66
1.6 Windshield Wiper Motor -V-, Removing and Installing……………………………………………………………………… 67
1.7 Windshield Wiper Motor, Replacing……………………………………………………………………………………… 68
1.8 Windshield Wiper Motor, Deactivating Alternating Park Position Function……………………………………………………. 69
1.9 Rain/Light Recognition Sensor, Removing and Installing…………………………………………………………………… 70
1.9.1 Rain/Light Recognition Sensor, Removing and Installing, Vehicles with Front Camera for Assistance Systems………………… 70
1.9.2 Rain/Light Recognition Sensor, Removing and Installing, Vehicles without Front Camera for Assistance Systems……………… 72
1.10 Rain/Light Recognition Sensor, Servicing………………………………………………………………………………. 74
1.10.1 Rain/Light Recognition Sensor, Servicing, TRW…………………………………………………………………….. 74
1.10.2 Rain/Light Recognition Sensor, Servicing, Valeo…………………………………………………………………… 75
2 Windshield Washer System…………………………………………………………………………………………………… 77
2.1 Overview – Windshield Washer System……………………………………………………………………………………. 77
2.1.1 Overview – Windshield Washer System, with Headlamp Washer System…………………………………………………….. 77
2.1.2 Overview – Windshield Washer System, without Headlamp Washer System………………………………………………….. 79
2.2 Washer Fluid Reservoir, Removing and Installing…………………………………………………………………………. 80
2.3 Windshield Washer Fluid Level Sensor, Removing and Installing…………………………………………………………….. 81
2.4 Windshield Washer Pump, Removing and Installing…………………………………………………………………………. 82
2.5 Spray Nozzles, Removing and Installing…………………………………………………………………………………. 82
2.6 Spray Nozzles, Adjusting……………………………………………………………………………………………… 83
3 Rear Window Wiper System…………………………………………………………………………………………………… 84
3.1 Overview – Rear Window Wiper System……………………………………………………………………………………. 84
3.2 Wiper Blade, Removing and Installing…………………………………………………………………………………… 85
3.3 Windshield Wiper Arm, Removing and Installing…………………………………………………………………………… 85
3.4 Wiper Arm, Adjusting…………………………………………………………………………………………………. 86
3.5 Rear Window Wiper Motor -V12-, Removing and Installing…………………………………………………………………… 86
4 Rear Window Washer System………………………………………………………………………………………………….. 88
4.1 Overview – Rear Window Washer System…………………………………………………………………………………… 88
4.1.1 Overview – Rear Window Washer System, Sedan, Except GTI…………………………………………………………….. 88
4.1.2 Overview – Rear Window Washer System, Sedan, GTI…………………………………………………………………… 89
4.1.3 Overview – Rear Window Washer System, Wagon……………………………………………………………………….. 90
4.2 Washer Fluid Reservoir, Removing and Installing…………………………………………………………………………. 90
4.3 Rear Window Washer Pump, Removing and Installing………………………………………………………………………… 90
4.4 Spray Nozzle, Removing and Installing………………………………………………………………………………….. 91
4.4.1 Spray Nozzle, Removing and Installing, Except GTI………………………………………………………………….. 91
4.4.2 Spray Nozzle, Removing and Installing, Only GTI……………………………………………………………………. 91
4.5 Spray Nozzle, Adjusting………………………………………………………………………………………………. 92
5 Headlamp Washer System…………………………………………………………………………………………………….. 93
5.1 Overview – Headlamp Washer System……………………………………………………………………………………… 93
5.2 Washer Fluid Reservoir, Removing and Installing…………………………………………………………………………. 93
5.3 Headlamp Washer Pump -V11-, Removing and Installing……………………………………………………………………… 94
5.4 Spray Nozzles, Removing and Installing…………………………………………………………………………………. 94
5.5 Spray Nozzles, Adjusting……………………………………………………………………………………………… 95
5.6 Lift Cylinder, Removing and Installing…………………………………………………………………………………. 95
6 Washer Fluid Hoses………………………………………………………………………………………………………… 97
6.1 Washer Fluid Hoses, Servicing…………………………………………………………………………………………. 97
7 Special Tools…………………………………………………………………………………………………………….. 98
94 – Exterior Lights, Switches…………………………………………………………………………………………………… 99
1 Headlamp………………………………………………………………………………………………………………….100
1.1 Overview – Headlamp…………………………………………………………………………………………………..100
1.1.1 Overview – Halogen Dual Headlamp………………………………………………………………………………….101
1.1.2 Overview – HID Headlamp………………………………………………………………………………………….103
1.1.3 Overview – HID Headlamp for Cornering Lamp and LED Daytime Running Lamp……………………………………………….105
1.1.4 Overview – HID Headlamp with Dynamic High Beam Control and LED-Daytime Running Lamps……………………………………107
1.1.5 Overview – Headlamp Housing Repair Set…………………………………………………………………………….109
1.2 Headlamp, Removing and Installing………………………………………………………………………………………109
1.3 Headlamp, Adjusting…………………………………………………………………………………………………..113
1.3.1 Halogen Twin Headlamp, Adjusting………………………………………………………………………………….113
1.3.2 HID Headlamp, Adjusting………………………………………………………………………………………….113
1.3.3 Fog Lamp, Adjusting……………………………………………………………………………………………..113
1.3.4 Auxiliary Headlamps, Adjusting……………………………………………………………………………………113
1.4 Headlamp Installation Position, Correcting………………………………………………………………………………113
1.5 Left/Right Front Turn Signal Bulb -M5- /-M7-, Removing and Installing………………………………………………………115
1.5.1 Left/Right Front Turn Signal Bulb -M5-/-M7-, Removing and Installing, Halogen Dual Headlamp……………………………..115
1.5.2 Left/Right Front Turn Signal Bulb -M5-/-M7-, Removing and Installing, HID Headlamps…………………………………….116
1.6 Headlamp Housing Repair Kit, Installing…………………………………………………………………………………117
1.7 Headlamp, Changing from LHD to RHD……………………………………………………………………………………..118
1.7.1 Headlamp, Changing from LHD to RHD, Halogen Dual Headlamp……………………………………………………………118
1.7.2 Headlamp, Changing from LHD to RHD, Except Halogen Dual Headlamp……………………………………………………..119
1.8 Left/Right Headlamp Beam Adjustment Motor – V48-/-V49-, Removing and Installing……………………………………………..119
1.8.1 Left/Right Headlamp Beam Adjustment Motor – V48-/-V49-, Removing and Installing, Halogen Dual Headlamps…………………..119
1.8.2 Left/Right Headlamp Beam Adjustment Motor – V48-/-V49-, Removing and Installing, HID Headlamps…………………………..120
1.9 Low Beam Headlamp Bulb, Removing and Installing………………………………………………………………………….121
1.10 Left/Right High Beam Headlamp Bulb – M30-/-M32-, Removing and Installing…………………………………………………..122
1.11 Left/Right HID Headlamp Bulb – L13-/-L14-, Removing and Installing………………………………………………………..123
1.12 Left/Right Position Lamp Bulb – M1-/-M3-, Removing and Installing…………………………………………………………125
1.12.1 Left/Right Position Lamp Bulb – M1-/-M3-, Removing and Installing, Halogen Dual Headlamp……………………………….125
1.12.2 Left/Right Position Lamp Bulb – M1-/-M3-, Removing and Installing, HID Headlamp……………………………………….126
1.13 Left/Right Daytime Running Lamp Bulb – L174-/-L175-, Removing and Installing……………………………………………….126
1.13.1 Left/Right Daytime Running Lamp Bulb – L174-/-L175-, Removing and Installing, Halogen Dual Headlamp……………………..126
1.13.2 Left/Right Daytime Running Lamp Bulb -L174-/-L175-, Removing and Installing, HID Headlamp………………………………126
1.14 Left/Right Daytime Running Lamp and Position Lamp LED Module – L176-/-L177-, Removing and Installing………………………….127
1.15 Left/Right Low Beam Headlamp Reflector Motor -V294-/-V295-, Removing and Installing…………………………………………127
1.16 Left/Right Cornering Lamp Bulb – L148-/-L149-, Removing and Installing…………………………………………………….127
1.17 Left/Right HID Headlamp Control Module – J343-/-J344-, Removing and Installing……………………………………………..128
1.18 Left/Right Headlamp Power Output Stage -J667-/-J668-, Removing and Installing………………………………………………129
1.19 Left/Right Daytime Running Lamp and Position Lamp Control Module – J860-/-J861-, Removing and Installing………………………130
1.20 Sensor for Left/Right Variable Headlamp Positioning Motor – G695-/-G696-, Removing and Installing…………………………….131
1.21 Left/Right Variable Headlamp Positioning Motor -V446-/-V447-, Removing and Installing……………………………………….131
1.22 Left/Right Swivel Module Position Sensor -G474-/-G475-, Removing and Installing…………………………………………….131
1.23 Left/Right Adaptive Cornering Lamp Motor – V318-/-V319-, Removing and Installing……………………………………………132
2 Fog Lamps…………………………………………………………………………………………………………………133
2.1 Overview – Fog Lamps………………………………………………………………………………………………….133
2.1.1 Overview – Fog Lamps, Except GTI………………………………………………………………………………….133
2.1.2 Overview – Fog Lamps, GTI………………………………………………………………………………………..134
2.2 Fog Lamp, Removing and Installing………………………………………………………………………………………134
2.2.1 Fog Lamp, Removing and Installing, Except GTI………………………………………………………………………134
2.2.2 Fog Lamp, Removing and Installing, GTI…………………………………………………………………………….135
2.3 Left/Right Front Fog Lamp Bulb – L22-/-L23-, Removing and Installing……………………………………………………….135
3 Lamps in Exterior Rearview Mirror……………………………………………………………………………………………137
3.1 Overview – Lamps in Exterior Rearview Mirror…………………………………………………………………………….137
3.2 Turn Signal, Removing and Installing……………………………………………………………………………………138
3.3 Exterior Rearview Mirror Entry Lamp, Removing and Installing………………………………………………………………140
4 Tail Lamps………………………………………………………………………………………………………………..141
4.1 Overview – Body Tail Lamps…………………………………………………………………………………………….141
4.1.1 Overview – Body Tail Lamps, Sedan, with Bulbs………………………………………………………………………141
4.1.2 Overview – Body Tail Lamps, Sedan, with LED………………………………………………………………………..143
4.1.3 Overview – Body Tail Lamps, Wagon…………………………………………………………………………………144
4.2 Overview – Rear Lid Tail Lamps…………………………………………………………………………………………145
4.2.1 Overview – Rear Lid Tail Lamps, Sedan, with Bulbs…………………………………………………………………..145
4.2.2 Overview – Rear Lid Tail Lamps, Sedan, with LED…………………………………………………………………….146
4.2.3 Overview – Rear Lid Tail Lamps, Wagon……………………………………………………………………………..147
4.3 Rear Lid Tail Lamp, Removing and Installing……………………………………………………………………………..148
4.3.1 Rear Lid Tail Lamp, Removing and Installing, Sedan………………………………………………………………….148
4.3.2 Rear Lid Tail Lamp, Removing and Installing, Wagon………………………………………………………………….149
4.4 Tail Lamp, Correcting Installed Position………………………………………………………………………………..150
4.4.1 Tail Lamp, Correcting Installed Position, Sedan…………………………………………………………………….150
4.4.2 Tail Lamp, Correcting Installed Position, Wagon…………………………………………………………………….151
4.5 Tail Lamp, Removing and Installing……………………………………………………………………………………..152
4.5.1 Tail Lamp, Removing and Installing, Sedan………………………………………………………………………….152
4.5.2 Tail Lamp, Removing and Installing, Wagon………………………………………………………………………….153
4.6 Right and Left Tail Lamp Bulb – M2-/-M4-, Removing and Installing………………………………………………………….153
4.6.1 Right and Left Tail Lamp Bulb – M2-/-M4-, Removing and Installing, Sedan………………………………………………153
4.6.2 Right and Left Tail Lamp Bulb – M2-/-M4-, Removing and Installing, Wagon………………………………………………154
4.7 Left/Right Rear Fog Lamp Bulb – L46-/-L47-, Removing and Installing………………………………………………………..156
4.7.1 Left/Right Rear Fog Lamp Bulb – L46-/-L47-, Removing and Installing, Sedan…………………………………………….156
4.7.2 Left/Right Rear Fog Lamp Bulb -L46-/-L47-, Removing and Installing, Wagon……………………………………………..157
4.8 Left/Right Brake/Tail Lamp Bulb -M21-/-M22-, Removing and Installing……………………………………………………….158
4.8.1 Left/Right Brake/Tail Lamp Bulb – M21-/-M22-, Removing and Installing, Sedan…………………………………………..158
4.8.2 Left/Right Brake/Tail Lamp Bulb – M21-/-M22-, Removing and Installing, Wagon…………………………………………..159
4.9 Back-Up Lamp, Removing and Installing…………………………………………………………………………………..160
4.9.1 Back-Up Lamp Bulb, Removing and Installing, Sedan…………………………………………………………………..160
4.9.2 Back-Up Lamp Bulb, Removing and Installing, Wagon…………………………………………………………………..161
4.10 Turn Signal Bulb, Removing and Installing………………………………………………………………………………162
4.10.1 Turn Signal Bulb, Removing and Installing, Sedan…………………………………………………………………..162
4.10.2 Turn Signal Bulb, Removing and Installing, Wagon…………………………………………………………………..163
5 High-Mounted Brake Lamp…………………………………………………………………………………………………….165
5.1 Overview – High-Mounted Brake Lamp……………………………………………………………………………………..165
5.1.1 Overview – High-Mounted Brake Lamp, Except GTI……………………………………………………………………..165
5.1.2 Overview – High-Mounted Brake Lamp, GTI……………………………………………………………………………166
5.2 High-Mounted Brake Lamp, Removing and Installing…………………………………………………………………………166
5.2.1 High-Mounted Brake Lamp, Removing and Installing, Except GTI…………………………………………………………166
5.2.2 High-Mounted Brake Lamp, Removing and Installing, GTI……………………………………………………………….167
6 License Plate Lamp…………………………………………………………………………………………………………169
6.1 Left/Right License Plate Lamp – X4-/-X5-, Removing and Installing………………………………………………………….169
6.1.1 Left/Right License Plate Lamp -X4-/-X5-, Removing and Installing, Sedan……………………………………………….169
6.1.2 Left/Right License Plate Lamp -X4-/-X5-, Removing and Installing, Wagon with LED……………………………………….169
6.1.3 Left/Right License Plate Lamp -X4-/-X5-, Removing and Installing, Wagon with Bulb………………………………………170
6.2 Left/Right License Plate Lamp Bulb – X4-/-X5-, Removing and Installing……………………………………………………..171
6.2.1 Left/Right License Plate Lamp Bulb – X4-/-X5-, Removing and Installing, Sedan………………………………………….171
6.2.2 Left/Right License Plate Lamp Bulb – X4-/-X5-, Removing and Installing, Wagon………………………………………….172
7 Access/Start Authorization………………………………………………………………………………………………….174
7.1 Component Location Overview – Access/Start Authorization System……………………………………………………………174
7.2 Component Location Overview – Keyless Access Authorization System………………………………………………………….176
7.2.1 Component Location Overview – Front Keyless Access Authorization System……………………………………………….176
7.2.2 Component Location Overview – Rear Keyless Access Authorization System, Sedan………………………………………….177
7.2.3 Component Location Overview – Rear Keyless Access Authorization System, Wagon………………………………………….178
7.3 Access/Start System Interface -J965-, Removing and Installing……………………………………………………………..178
7.3.1 Access/Start System Interface -J965-, Removing and Installing, Except North America…………………………………….178
7.3.2 Access/Start System Interface -J965-, Removing and Installing………………………………………………………..179
7.4 Driver Exterior and Front Passenger Exterior Door Handle Touch Sensor – G415-/-G416-, Removing and Installing…………………..180
7.5 Access/Start System Antenna 1 in Vehicle Interior -R138-, Removing and Installing……………………………………………181
7.6 Driver Access/Start System Antenna -R134-, Removing and Installing…………………………………………………………181
7.7 Front Passenger Access/Start System Antenna -R135-, Removing and Installing…………………………………………………181
7.8 Access/Start System Antenna in Luggage Compartment -R137-, Removing and Installing…………………………………………..182
7.8.1 Access/Start System Antenna in Luggage Compartment -R137-, Removing and Installing, Sedan……………………………….182
7.8.2 Access/Start System Antenna in Luggage Compartment -R137-, Removing and Installing, Wagon……………………………….182
7.9 Access/Start System Antenna in Rear Bumper -R136-, Removing and Installing………………………………………………….183
8 Steering Column Switch Module……………………………………………………………………………………………….184
8.1 Overview – Steering Column Switch Module………………………………………………………………………………..184
8.1.1 Overview – Steering Column Switch Module with Mechanical Ignition Switch………………………………………………184
8.1.2 Overview – Steering Column Switch Module and Electronic Ignition Switch……………………………………………….186
8.2 Lock Cylinder, Removing and Installing………………………………………………………………………………….187
8.3 Ignition Switch Key Lock Solenoid -N376-, Removing and Installing………………………………………………………….188
8.4 Ignition/Starter Switch, Removing and Installing…………………………………………………………………………189
8.5 Steering Column Switch Module, Removing and Installing……………………………………………………………………190
8.5.1 Steering Column Switch Module, Removing and Installing, Kostal……………………………………………………….190
8.5.2 Steering Column Switch Module, Removing and Installing, Valeo………………………………………………………..192
8.6 Steering Column Electronics Control Module -J527-, Removing and Installing………………………………………………….195
8.6.1 Steering Column Electronics Control Module -J527-, Removing and Installing, Kostal……………………………………..195
8.6.2 Steering Column Electronics Control Module -J527-, Removing and Installing, Valeo………………………………………197
8.7 Turn Signal Switch -E2-, Removing and Installing…………………………………………………………………………200
8.7.1 Turn Signal Switch -E2-, Removing and Installing, Kostal…………………………………………………………….200
8.7.2 Turn Signal Switch -E2-, Removing and Installing, Valeo……………………………………………………………..201
8.8 Cruise Control Switch -E45-, Removing and Installing……………………………………………………………………..202
8.9 Windshield Wiper Intermittent Mode Switch -E22-, Removing and Installing……………………………………………………202
8.10 Anti-Theft Immobilizer Reader Coil -D2-, Removing and Installing………………………………………………………….202
8.10.1 Anti-Theft Immobilizer Reader Coil -D2-, Removing and Installing, Vehicles with Ignition Key……………………………202
8.10.2 Anti-Theft Immobilizer Reader Coil -D2-, Removing and Installing, Vehicles with Keyless Access………………………….202
8.11 Steering Lock Housing, Removing and Installing………………………………………………………………………….203
9 Parking Aid……………………………………………………………………………………………………………….205
9.1 Overview – Parking Aid………………………………………………………………………………………………..205
9.1.1 Overview – Front Parking Aid……………………………………………………………………………………..205
9.1.2 Overview – Rear Parking Aid, Sedan………………………………………………………………………………..207
9.1.3 Overview – Rear Parking Aid, Wagon………………………………………………………………………………..208
9.2 Parking Aid Control Module -J446-, Removing and Installing………………………………………………………………..208
9.3 Front Parking Aid Warning Buzzer -H22-, Removing and Installing……………………………………………………………209
9.4 Rear Parking Aid Warning Buzzer -H15-, Removing and Installing…………………………………………………………….210
9.4.1 Rear Parking Aid Warning Buzzer -H15-, Removing and Installing, Sedan…………………………………………………210
9.4.2 Rear Parking Aid Warning Buzzer -H15-, Removing and Installing, Wagon…………………………………………………210
9.5 Front Parking Aid Sensor, Removing and Installing………………………………………………………………………..211
9.6 Rear Parking Aid Sensor, Removing and Installing…………………………………………………………………………213
10 Parallel Parking Assist……………………………………………………………………………………………………214
10.1 Overview – Parallel Parking Assist…………………………………………………………………………………….214
10.1.1 Overview – Parallel Parking Assist, Sedan…………………………………………………………………………214
10.1.2 Overview – Parallel Parking Assist, Wagon…………………………………………………………………………215
10.2 Control Module, Removing and Installing………………………………………………………………………………..215
10.3 Front Sensor, Removing and Installing………………………………………………………………………………….216
10.4 Rear Sensor, Removing and Installing…………………………………………………………………………………..216
11 Automatic Headlamp Range Control……………………………………………………………………………………………217
11.1 Overview – Automatic Headlamp Range Control…………………………………………………………………………….217
11.1.1 Overview – Automatic Headlamp Range Control, Sedan…………………………………………………………………217
11.1.2 Overview – Automatic Headlamp Range Control, Wagon…………………………………………………………………218
11.2 Control Module for Headlamp Range/Cornering Lamp and Headlamp Range, Removing and Installing…………………………………219
12 Trailer Hitch…………………………………………………………………………………………………………….221
12.1 Overview – Trailer Hitch Socket……………………………………………………………………………………….221
12.1.1 Overview – Trailer Hitch Socket, Sedan……………………………………………………………………………221
12.1.2 Overview – Trailer Hitch Socket, Wagon……………………………………………………………………………222
12.2 Trailer Socket -U10-…………………………………………………………………………………………………222
12.3 Towing Recognition Control Module -J345-, Removing and Installing…………………………………………………………223
12.3.1 Towing Recognition Control Module -J345-, Removing and Installing, Sedan……………………………………………..223
12.3.2 Towing Recognition Control Module -J345-, Removing and Installing, Wagon……………………………………………..223
13 Blind Spot Detection………………………………………………………………………………………………………225
13.1 Overview – Blind Spot Detection……………………………………………………………………………………….225
13.1.1 Overview – Blind Spot Detection, Sedan……………………………………………………………………………225
13.1.2 Overview – Blind Spot Detection, Wagon……………………………………………………………………………226
13.2 Blind Spot Detection Warning Lamp in Left/Right Exterior Mirror – K303-/-K304-, Removing and Installing……………………….227
13.3 Blind Spot Detection Control Module -J1086-/Blind Spot Detection Control Module 2 -J1087-, Removing and Installing……………..228
13.3.1 Blind Spot Detection Control Module -J1086-/Blind Spot Detection Control Module 2 -J1087-, Removing and Installing, Sedan….228
13.3.2 Blind Spot Detection Control Module -J1086-/Blind Spot Detection Control Module 2 -J1087-, Removing and Installing, Wagon….229
13.4 Blind Spot Detection, Calibrating……………………………………………………………………………………..230
13.4.1 Preparing for Calibration……………………………………………………………………………………….230
13.4.2 Calibration Preparation Work…………………………………………………………………………………….232
13.4.3 Blind Spot Detection Control Module -J1086-/Blind Spot Detection Control Module 2 -J1087-, Calibrating…………………..235
14 Special Tools…………………………………………………………………………………………………………….237
96 – Interior Lights, Switches……………………………………………………………………………………………………239
1 Lamps…………………………………………………………………………………………………………………….240
1.1 Component Location Overview – Instrument Panel Lamps……………………………………………………………………..241
1.2 Component Location Overview – Front Door Lamps…………………………………………………………………………..242
1.3 Component Location Overview – Rear Door Lamps……………………………………………………………………………243
1.4 Component Location Overview – Center Console Lamps……………………………………………………………………….244
1.5 Component Location Overview – Luggage Compartment Lamps…………………………………………………………………..245
1.5.1 Component Location Overview – Luggage Compartment Lamps, Sedan……………………………………………………….245
1.5.2 Component Location Overview – Luggage Compartment Lamps, Wagon……………………………………………………….246
1.6 Component Location Overview – Roof Trim Panel Lamps………………………………………………………………………247
1.6.1 Component Location Overview – Roof Trim Panel Lamps, Sedan…………………………………………………………..247
1.6.2 Component Location Overview – Roof Trim Panel Lamps, Wagon, without Panorama Roof………………………………………248
1.6.3 Component Location Overview – Roof Trim Panel Lamps, Wagon, with Panorama Roof…………………………………………249
1.7 Glove Compartment Lamp -W6-, Removing and Installing……………………………………………………………………..249
1.8 Bulb for Glove Compartment Lamp -W6-, Replacing………………………………………………………………………….250
1.9 Left/Right Front Footwell Lamp -K268-/-K269-, Removing and Installing………………………………………………………251
1.9.1 Left Front Footwell Lamp -K268-, Removing and Installing, Driver Side…………………………………………………251
1.9.2 Right Front Footwell Lamp -K269-, Removing and Installing, Front Passenger Side………………………………………..251
1.10 Left/Right Front Footwell Illumination Bulb -L151-/-L152-, Removing and Installing………………………………………….252
1.11 Central Locking -Safe- Indicator Lamp -K133-, Removing and Installing……………………………………………………..252
1.12 Left/Right Front Entry Lamp -W31-/-W32-, Removing and Installing………………………………………………………….253
1.13 Entry Lamp Bulb, Removing and Installing……………………………………………………………………………….254
1.14 Driver/Front Passenger Door Warning Lamp -W30-/-W36-, Removing and Installing………………………………………………254
1.15 Driver/Front Passenger Door Opener Illumination Bulb -L108-/-L109-, Removing and Installing………………………………….254
1.16 Left/Right Front Door Ambient Lighting Bulb 2 – L203-/-L204-, Removing and Installing……………………………………….255
1.17 Left/Right Rear Entry Lamp -W33-/-W34-, Removing and Installing…………………………………………………………..255
1.18 Left/Right Rear Door Warning Lamp – W37-/-W38-, Removing and Installing……………………………………………………256
1.19 Selector Lever Transmission Range Position Display Unit -Y26-, Removing and Installing………………………………………256
1.20 Luggage Compartment Lamp -W3-, Removing and Installing…………………………………………………………………..256
1.20.1 Luggage Compartment Lamp -W3-, Removing and Installing, Sedan……………………………………………………….256
1.20.2 Luggage Compartment Lamp -W3-, Removing and Installing, Wagon……………………………………………………….257
1.21 Bulb for Luggage Compartment Lamp -W3-, Removing and Installing…………………………………………………………..257
1.21.1 Bulb for Luggage Compartment Lamp -W3-, Removing and Installing, Sedan……………………………………………….257
1.21.2 Bulb for Luggage Compartment Lamp -W3-, Removing and Installing, Wagon……………………………………………….258
1.22 Driver/Front Passenger Vanity Mirror Lamp -W20-/-W14-, Removing and Installing……………………………………………..258
1.23 Driver/Front Passenger Vanity Mirror Lamp -W20-/-W14- Bulb, Removing and Installing…………………………………………259
1.24 Front Interior Lamp -W1- Bulb, Removing and Installing…………………………………………………………………..260
1.24.1 Front Interior Lamp -W1- Bulb, Removing and Installing, LED…………………………………………………………260
1.24.2 Front Interior Lamp -W1- Bulb, Removing and Installing, with Bulbs…………………………………………………..260
1.25 Rear Interior Lamp -W43- Bulb, Removing and Installing…………………………………………………………………..261
1.25.1 Rear Interior Lamp -W43- Bulb, Removing and Installing, with Bulbs…………………………………………………..261
1.25.2 Rear Interior Lamp -W43- Bulb, Removing and Installing, LED…………………………………………………………262
1.26 Left/Right Rear Reading Lamp -W11-/-W12-, Removing and Installing…………………………………………………………262
1.27 Left/Right Rear Interior Lamp -W47-/-W48-, Replacing…………………………………………………………………….262
2 Controls………………………………………………………………………………………………………………….266
2.1 Component Location Overview – Instrument Panel Controls…………………………………………………………………..267
2.2 Component Location Overview – Controls in Front Doors…………………………………………………………………….268
2.3 Component Location Overview – Controls in Rear Doors……………………………………………………………………..269
2.4 Component Location Overview – Controls in Center Console………………………………………………………………….270
2.5 Component Location Overview – Controls in Luggage Compartment……………………………………………………………..271
2.6 Component Location Overview – Controls in Roof Trim Panel…………………………………………………………………272
2.7 Rotary Light Switch -EX1-, Removing and Installing……………………………………………………………………….273
2.8 Headlamp Range Control Adjuster -E102-, Removing and Installing……………………………………………………………273
2.9 Driving Profile Selection Button -E735-, Removing and Installing…………………………………………………………..274
2.10 Start/Stop Mode Button -E693-, Removing and Installing…………………………………………………………………..274
2.11 ASR/ESP Button -E256-, Removing and Installing………………………………………………………………………….274
2.12 Parking Aid Button -E266-, Removing and Installing………………………………………………………………………274
2.13 Parallel Parking Assistance Button -E581-, Removing and Installing………………………………………………………..274
2.14 Center Console Switch Module 1 and 2 -EX23-/-EX30-, Removing and Installing………………………………………………..275
2.15 Emergency Flasher Switch -EX3-, Removing and Installing………………………………………………………………….276
2.16 Left/Right Seat Heating Button -E653-/-E654-, Removing and Installing……………………………………………………..277
2.17 Glove Compartment Lamp Switch -E26-, Removing and Installing……………………………………………………………..277
2.18 Exterior Rearview Mirror Adjuster -EX11-, Removing and Installing…………………………………………………………277
2.19 Power Window Control Head in Driver Door -E512-, Removing and Installing…………………………………………………..278
2.20 Front Passenger Power Window Button -E716-, Removing and Installing……………………………………………………….279
2.21 Driver Interior Locking Button -E308-, Removing and Installing……………………………………………………………279
2.22 Interior Monitoring And Vehicle Inclination Deactivation Button -E616-, Removing and Installing………………………………280
2.23 Driver and Front Passenger Door Contact Switch – F2-/-F3-, Removing and Installing………………………………………….281
2.24 Driver and Passenger Side Rear Power Window Button -E711-/-E713-, Removing and Installing……………………………………281
2.25 Left/Right Rear Door Contact Switch -F10-/-F11-, Removing and Installing…………………………………………………..281
2.26 Start System Button -E378-, Removing and Installing……………………………………………………………………..281
2.27 Rear Lid Contact Switch, Removing and Installing………………………………………………………………………..282
2.28 Driver and Front Passenger Vanity Mirror Lamp Contact Switch – F147-/-F148-, Removing and Installing………………………….282
2.29 Sunroof Button -E325-, Removing and Installing………………………………………………………………………….282
2.30 Front Interior Lamp/Reading Lamp, Removing and Installing………………………………………………………………..283
2.31 Rear Interior Lamp/Reading Lamp, Removing and Installing…………………………………………………………………283
2.32 Left/Right Front Reading Lamp Button – E633-/-E634-, Removing and Installing……………………………………………….285
3 Anti-Theft Alarm System…………………………………………………………………………………………………….286
3.1 Overview – Interior Monitoring…………………………………………………………………………………………286
3.2 Alarm Horn -H12-, Removing and Installing……………………………………………………………………………….287
3.3 Anti-Theft Alarm System Sensor -G578-, Removing and Installing…………………………………………………………….287
3.3.1 Anti-Theft Alarm System Sensor -G578-, Removing and Installing, Version with Two Screws…………………………………287
3.3.2 Anti-Theft Alarm System Sensor -G578-, Removing and Installing, Version with Four Screws………………………………..289
4 Driver Assistance Systems Front Camera……………………………………………………………………………………….291
4.1 Driver Assistance Systems Front Camera, Removing and Installing……………………………………………………………291
5 Cigarette Lighter and Socket………………………………………………………………………………………………..292
5.1 Overview – Converter with Socket, 12 V-230 V…………………………………………………………………………….292
5.2 Cigarette Lighter -U1-, Removing and Installing………………………………………………………………………….293
5.3 Socket Illumination Bulb -L42-, Removing and Installing…………………………………………………………………..293
5.4 Rear Cigarette Lighter Illumination Bulb -L32-, Removing and Installing…………………………………………………….293
5.5 Socket -U-, Removing and Installing…………………………………………………………………………………….293
5.6 Converter with Socket, 12 V-230 V -U13-, Removing and Installing…………………………………………………………..293
6 Special Tools……………………………………………………………………………………………………………..295
97 – Wiring…………………………………………………………………………………………………………………….296
1 Relay Carriers, Fuse Panels and E-Boxes………………………………………………………………………………………296
1.1 Component Location Overview – Relay Carriers, Fuse Panels and E-Boxes………………………………………………………296
1.1.1 Relay Carriers, Fuse Panels and E-Boxes……………………………………………………………………………296
1.1.2 Relay Carrier and Instrument Panel/A-Pillar Fuse Panel………………………………………………………………298
1.2 E-Box, Removing and Installing…………………………………………………………………………………………298
1.3 E-Box Relay and Fuse Panels, Removing and Installing……………………………………………………………………..300
1.3.1 Fuse Panel B -SB-, Removing and Installing…………………………………………………………………………300
1.3.2 Fuse Panel A -SA-, Removing and Installing…………………………………………………………………………301
1.4 Relay and Fuse Carrier Behind Instrument Panel on Driver Side, Removing and Installing……………………………………….302
2 Control Modules……………………………………………………………………………………………………………303
2.1 Component Location Overview – Control Modules……………………………………………………………………………303
2.1.1 Component Location Overview – Front Control Modules…………………………………………………………………303
2.1.2 Component Location Overview – Rear Control Modules………………………………………………………………….305
2.2 Overview – Control Modules…………………………………………………………………………………………….306
2.3 Overview – Data Bus On Board Diagnostic Interface………………………………………………………………………..307
2.4 Vehicle Electrical System Control Module -J519-, Removing and Installing……………………………………………………307
2.5 Data Bus On Board Diagnostic Interface -J533-, Removing and Installing……………………………………………………..308
2.6 Vehicle Electrical System Control Module -J519- Bracket, Removing and Installing…………………………………………….309
2.7 Vehicle Electrical System Control Module -J519- Bracket, Replacing…………………………………………………………310
2.8 Parking Aid Control Module -J446-/Parallel Parking Assistance Control Module -J791- Bracket, Removing and Installing…………….310
3 Connectors………………………………………………………………………………………………………………..312
3.1 Wiring Harnesses and Connectors, Repairing………………………………………………………………………………312
3.1.1 Electric Wiring Harnesses and Connectors, Repairing…………………………………………………………………312
3.1.2 Connector Housings and Connectors, Repairing……………………………………………………………………….312
4 Connector Housings, Releasing and Disassembling……………………………………………………………………………….313
5 Antenna Wires, Repairing……………………………………………………………………………………………………314
6 Fiber-Optic Cable………………………………………………………………………………………………………….315
7 Vehicle Diagnostic Tester…………………………………………………………………………………………………..316
8 Revision History…………………………………………………………………………………………………………..317
VIDEO PREVIEW OF THE MANUAL:
PLEASE NOTE:
- This is the SAME MANUAL used by the dealerships to diagnose your vehicle
- No waiting for couriers / posts as this is a PDF manual and you can download it within 2 minutes time once you make the payment.
- Your payment is all safe and the delivery of the manual is INSTANT – You will be taken to the DOWNLOAD PAGE.
- So have no hesitations whatsoever and write to us about any queries you may have : heydownloadss @gmail.com
S.V


