

Liebherr Hydraulic excavator R 918 1308 1309 1372 1496 1607 1689 1697 Operator’s manual 37753 – PDF DOWNLOAD
FILE DETAILS:
Liebherr Hydraulic excavator R 918 1308 1309 1372 1496 1607 1689 1697 Operator’s manual 37753 – PDF DOWNLOAD
Language : English
Pages :372
Downloadable : Yes
File Type : PDF
Size:84.3 MB
DESCRIPTION:
Liebherr Hydraulic excavator R 918 1308 1309 1372 1496 1607 1689 1697 Operator’s manual 37753 – PDF DOWNLOAD
Product ID
Manufacturer: Liebherr-France SAS
Type:R 918
Type no.: 1308, 1309, 1372, 1496, 1607, 1689, 1697
From Serial no.:37753
Preface
This operating manual is intended for you as the machine operator or as a member of the maintenance personnel. It contains warnings, important information, and tips for working with the machine. It simplifies the process of familiarization and getting to know the machine and helps to avoid faults caused by incorrect operation.
- Compliance with the operating manual increases the reliability and service life of the machine.
- The operating manual must be kept with the machine. Make sure that a copy is always kept close at hand at the workplace.
- Read the operating manual before initial commissioning and subsequently at regular intervals. Everyone who carries out work with or on the machine must be familiar with and use this operating manual.
Examples of this work:
- Operation, including setup and fitting attachments, elimination of faults, care, disposal of service products, and consumables.
- Maintenance, including servicing, inspection, and repair.
- Transporting or loading the machine.
The owner is responsible for supplementing the operating manual with instructions based on existing national regulations on accident prevention and environmental protection. In addition to this operating manual and the regulations on accident prevention applicable in the user’s country and at the place of use, it is also necessary to comply with recognized technical rules on safety and technically proficient working.
- Some sections of this operating manual do not apply to all machines.
- Some illustrations in this operating manual may show details and implements that are different from your machine.
- In some illustrations, protective devices and covers have been removed to provide a clearer representation.
- Liebherr machines are subject to continuous development and improvement. This may have resulted in modifications to your machine that are possibly not referred to in this operating manual.
- If you require further explanations or information, please contact Liebherr customer service.
TABLE OF CONTENTS:
Liebherr Hydraulic excavator R 918 1308 1309 1372 1496 1607 1689 1697 Operator’s manual 37753 – PDF DOWNLOAD
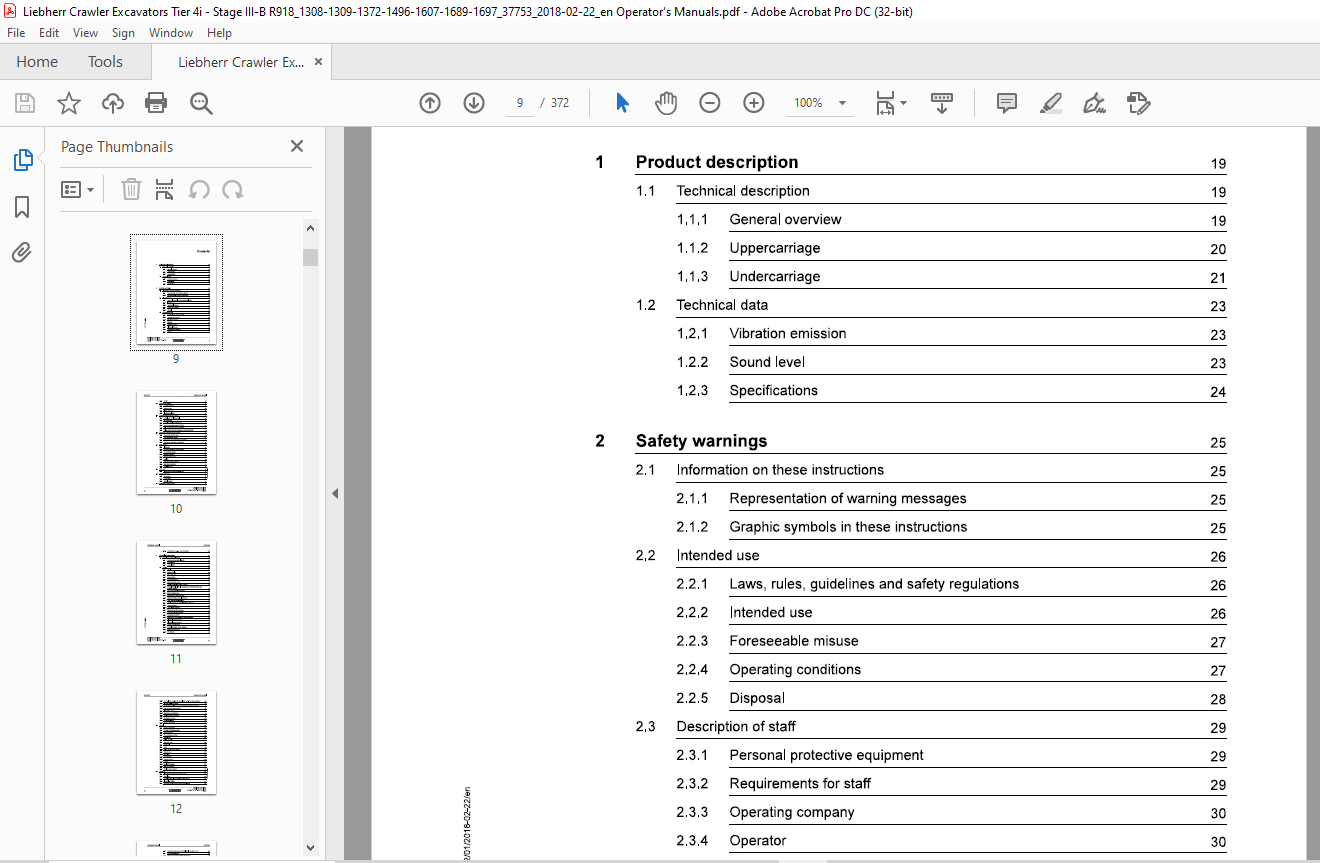
1 Product description
1.1 Technical description
1.1.1 General overview
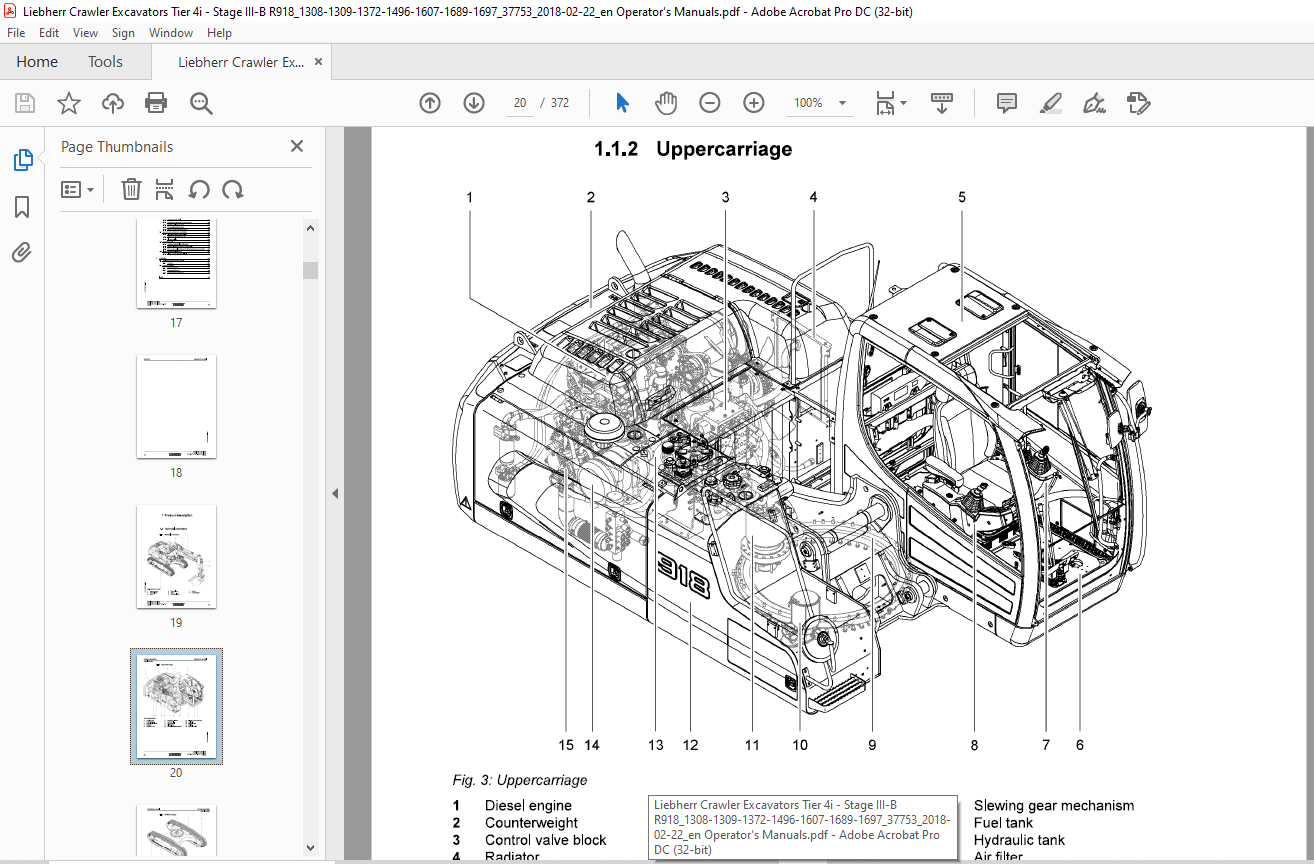
1.1.2 Uppercarriage
1.1.3 Undercarriage
1.2 Technical data
1.2.1 Vibration emission
1.2.2 Sound level
1.2.3 Specifications
2 Safety warnings
2.1.1 Representation of warning messages
2.1.2 Graphic symbols in these instructions
Intended use
2.2.1 Laws, rules, guidelines and safety regulations
2.2.2 Intended use
2.2.3 Foreseeable misuse
2.2.4 Operating conditions
2.2.5 Disposal
Description of staff
2.3.1 Personal protective equipment
2.3.2 Requirements for staff
2.3.3 Operating company
2.3.4 Operator
2.3.5 Maintenance staff
2.3.6 Electrical engineer
2.3.7 Refrigeration technician
2.3.8 Rigger
2.3.9 Spotter 34
2.4 Signs on the machine 35
2.4.1 Locations of signs 35
2.4.2 Warning signs 35
2.4.3 Information signs 38
2.4.4 Identification plates 42
2.5 Protective devices on the machine 43
2.5.1 Safety lever or folding console 43
2.5.2 Operator’s cab 43
2.5.3 Height-adjustable operator’s cab 43
2.5.4 Tip over protective structure (TOPS) 44
2.5.5 Roll over protective structure (ROPS) 44
2.5.6 Falling object protective structures (FOPS and FGPS) 45
2.6 Emergency equipment on the machine 45
2.6.1 Emergency exit (standard) 45
2.6.2 Fire extinguisher (option) 45
2.6.3 Emergency command devices of machine 46
2.6.4 Emergency stop function of machine 46
2.7 Safe operation 46
2.7.1 Intoxicants 46
2.7.2 Dangerous fuels and operating fluids 47
2.7.3 Transporting machine 47
2.7.4 Access to machine 48
2.7.5 Machine danger zone 49
2.7.6 Visibility 49
2.7.7 Protection against vibration 50
2.7.8 Operation of machine 51
2.7.9 Load-lifting work 53
Overview of operator’s platform
Control unit A
Control unit B
Display
Status symbols
Start page menu
Camera menu
Air conditioning unit
Operating status menu
Diesel particle filter submenu (option)
Sensor-controlled low idle automatic and automatic engine stop
submenu (option)
Measurement displays submenu
System settings menu
Operating hour meter submenu
Windscreen wiper interval submenu
Radio remote control submenu
Display brightness and display volume submenu
Camera submenu
Unit selection submenu
Time zone and time submenu
Language selection submenu
Test system submenu
Brightness of LED headlights submenu (option)
Electrical outputs submenu
Electrical inputs submenu
Function settings menu
Central lubrication system submenu
Maintenance submenu
3.2.27 Hoist cylinder shut-off and stick cylinder shut-off submenu (option) 96
3.2.28 Bleeding oil filter submenu 97
3.2.29 Priority between lifting boom and turning uppercarriage submenu 97
3.2.30 Stick priority submenu (option) 98
3.2.31 Information menu 98
3.2.32 Operating hours submenu 99
3.2.33 Fuel consumption submenu 100
3.2.34 CodingKey submenu 101
3.2.35 Tool Control menu 101
3.2.36 Service codes menu 102
3.3 Control 104
3.3.1 Battery main switch 104
3.3.2 Entering and exiting machine 105
3.3.3 Emergency exit 106
3.3.4 Fire extinguisher (option) 106
3.3.5 Safety lever 107
3.3.6 Folding console 107
3.3.7 Operator’s seat 109
3.3.8 Safety belt 115
3.3.9 Horn 116
3.3.10 Tilting operator’s cab (option) 117
3.3.11 Windscreen 117
3.3.12 Sun blind 120
3.3.13 Side windows 121
3.3.14 Viewing devices 122
3.3.15 Lighting 129
3.3.16 Cab lighting system 130
3.3.17 Windscreen wipers 131
3.4.6 Preparing machine for use in biologically sensitive areas
3.4.7 Starting diesel engine
3.4.8 Bringing machine to operating temperature
3.4.9 Engine speed and operating mode
3.4.10 After starting
3.4.11 Sensor-controlled low idle automatic
3.4.12 Automatic engine shut-off after idling (option)
3.4.13 Shutting off diesel engine
3.4.14 Travelling and braking
3.4.15 Travel alarm (option)
3.4.16 Travelling on slopes
3.4.17 Travelling under obstacles
3.4.18 Controlling dozer blade
3.4.19 Controlling the working attachment
3.4.20 Turning and braking uppercarriage
3.4.21 Turning alarm (option)
3.4.22 Hoist cylinder protection (option)
3.4.23 Stick cylinder protection
3.4.24 Controlling special working attachment without mini-joystick (option)
3.4.25 Controlling special working attachment with mini-joystick (option)
3.4.26 Tiltrotator (option)
3.4.27 Control changeover (option)
3.4.28 Changing over control of right mini-joystick (option)
3.4.29 Changing over control of left double pedal (option)
3.4.30 Changing over control of joystick control (option)
3.4.31 Reversing fan drive for radiator cleaning (option)
3.5 Shut-off functions
3.5.1 Stick cylinder shut-off and hoist cylinder shut-off (option)
3.5.2 Overload warning system (option)
3.6 General working methods
R 918 -1607, R 918 -1496,
R 918 -1689, R 918 -1309,
3.6.1 Working without damaging machine
3.6.2 Putting machine in working position
3.6.3 Working on slope
3.6.6 Working with a hydraulic hammer 184
3.6.7 Working with the grapple 185
3.6.8 Working with the clamshell 185
3.6.9 Transferring loads 186
3.6.10 Loading a transport vehicle 187
3.6.11 Lifting loads 187
3.6.12 Lifting loads with quick coupler 188
3.6.13 Lifting loads using working tool with load lift hook 189
3.7 Installing and removing working attachment 191
3.7.1 Installing and removing working attachment pins 191
3.7.2 Installing and removing bucket 191
3.7.3 Installing and removing bucket with special seal 193
3.7.4 Using quick coupler 194
3.7.5 Installing and removing grapple on stick 194
3.7.6 Installing and removing grapple on industrial stick 196
3.7.7 Installing and removing stick 198
3.7.8 Installing and removing boom 198
3.8 Parking machine 199
3.8.1 Parking machine on level ground 199
3.8.2 Parking machine on a slope 200
3.9 Transport 201
3.9.1 Driving machine onto low-loader 201
3.9.2 Lifting machine 203
3.9.3 Tying down machine 206
3.10 Emergency operation 208
3.10.1 Using emergency mode 208
3.10.2 Jump starting 210
3.10.3 Lowering working attachment when engine is shut off 211
3.10.4 Lowering operator’s cab in an emergency (option) 211
3.10.5 Central lubrication system 213
3.10.6 Towing 213
Malfunctions 215
4.1 Service code tables
4.1.1 Warning symbols
4.2 Fault – Cause – Remedy
4.2.1 Diesel engine and fuel system
4.2.2 Hydraulic system
4.2.3 Travel gear
4.2.4 Electrical system
4.2.5 Heating, ventilation and air conditioning unit
4.2.6 Working attachment
4.3 Problem remedy
4.3.1 Fuses and relays
Maintenance
5.1 Inspection and maintenance schedule
5.2 Filling quantities and lubrication chart
5.2.1 Filling quantities
5.2.2 Lubrication chart
5.3 Fuels, lubricants and operating fluids
5.3.1 General information
5.3.2 Oil analysis
5.3.3 Diesel fuels
5.3.4 Engine oils
5.3.5 Refrigerant
5.3.6 Coolant
5.3.7 Hydraulic oils
5.3.8 Gear oils
5.3.9 Greases
5.3.10 Windscreen washer fluid
5.3.11 Lubricants and care products for electrical and mechanical systems 250
5.4 Access points for maintenance work
5.4.1 Access points on uppercarriage
5.4.2 Access points under the uppercarriage
5.4.3 Access points on the undercarriage
5.5 Preparing for maintenance
5.5.1 Maintenance procedures
5.5.2 Safety instructions
5.6 General maintenance
R 918 -1607, R 918 -1496,
R 918 -1689, R 918 -1309,
R 918 -1697, R 918 -1308, R 918 -1372
5.6.1 Welding 256
5.6.2 Bleeding hydraulic cylinders 256
5.6.3 Applying corrosion protection to piston rods 257
5.6.4 Cleaning the machine 258
5.6.5 Cleaning travel gear 260
5.6.6 Cleaning fan and radiator 260
Complete machine 261
5.7.1 Checking components for cracks 261
Drive group 262
5.8.1 Diesel engine: Putting in maintenance position 262
5.8.2 Diesel engine: Checking oil level 262
5.8.3 Diesel engine: Checking condition, tightness and cleanliness 263
5.8.4 Diesel engine: Bleeding oil filter 263
5.8.5 Fuel pre-filter: Draining water 264
5.8.6 Fuel tank: Draining water and sediments 265
5.8.7 Fuel fine filter: Replacing filter element 266
5.8.8 Air filter: Emptying dust collecting tank 267
5.8.9 Air filter: Replacing main filter cartridge 267
Cooling system 269
5.9.1 Checking coolant level 269
5.9.2 Coolant: Checking concentration 270
Working hydraulics 274
5.10.1 Depressurising hydraulic system 274
5.10.2 Hydraulic tank: Checking oil level 275
5.10.3 Hydraulic tank: Draining water and sediments 277
5.10.4 Return filter: Checking and cleaning magnetic rod 278
5.10.5 Bypass filter (option): Checking level of contamination of filter cartridge 278
5.10.6 Hydraulic hoses: Checking condition and tightness 279
Electrical system 280
5.11.1 General information 280
Travel gear 281
5.12.1 Checking track tension 281
5.12.2 Tightening track 282
5.12.3 Slackening track 283
5.12.4 Track pads and sprocket wheels: Checking mounting 284
5.13 Working attachment
5.13.1 Lubricating dozer blade
5.13.2 Lubricating working tool
5.13.3 Checking pin connections for secure seating
5.13.4 Checking steel parts for cracks
5.13.5 Pin bearing: checking for wear
5.13.6 Changing bucket teeth with Z system
5.14 Operator’s cab, heating and air conditioning
5.14.1 Filling with windscreen washer fluid
5.14.2 Switching on air conditioning unit
5.14.3 Cleaning pre-filter
5.15 Lubrication system
5.15.1 Lubrication system: Filling with grease
5.15.2 Checking lubrication of bearings (grease collar)
5.15.3 Pipes, hoses and lubricating points: Checking tightness and condition
5.16 Slewing gearbox and slewing ring
5.16.1 Slewing gearbox: Checking oil level
Appendix
6.1 Pre-tightening torque and turning angle
6.1.1 Procedure
6.2 Corrosion protection
6.2.1 Scope and purpose
6.2.2 Reference documents
6.2.3 Requirements and description
Index
IMAGES PREVIEW OF THE MANUAL:
VIDEO PREVIEW OF THE MANUAL:
PLEASE NOTE:
- This is the SAME exact manual used by your dealers to fix your vehicle.
- The same can be yours in the next 2-3 mins as you will be directed to the download page immediately after paying for the manual.
- Any queries / doubts regarding your purchase, please feel free to contact [email protected]
S.M


