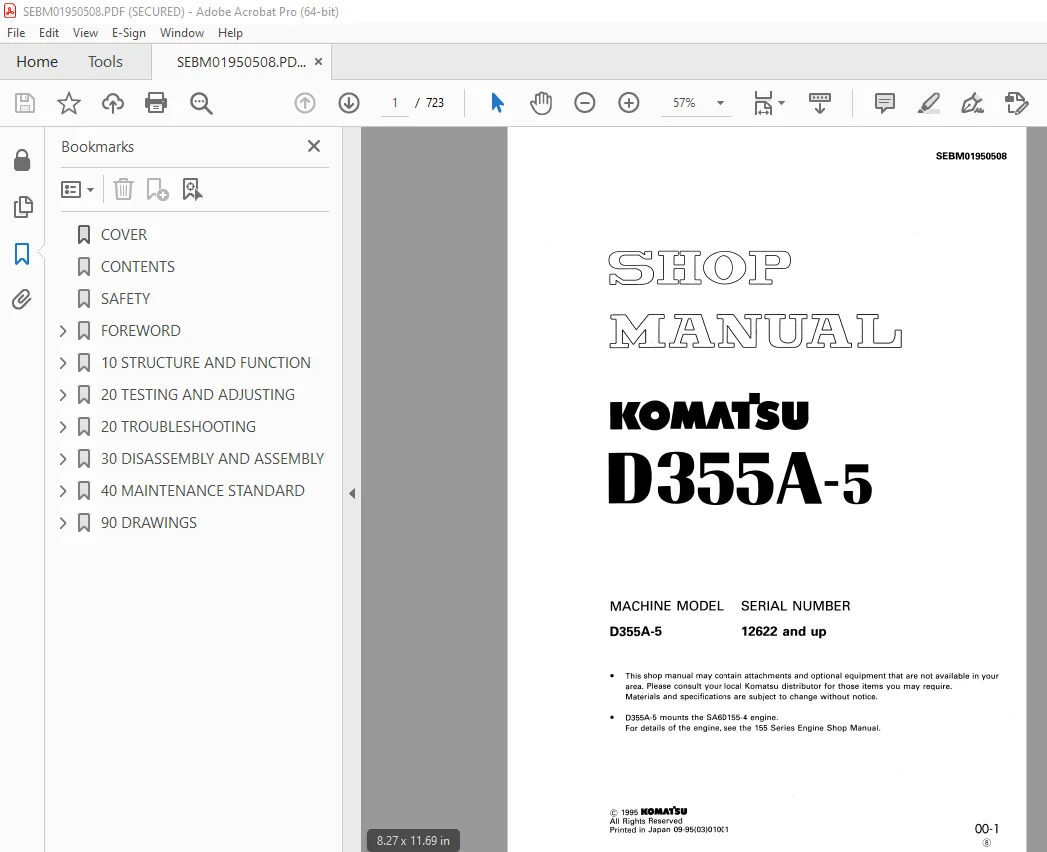
Komatsu D355A-5 Bulldozer Shop Manual SEBM01950508 PDF
$32.95
Komatsu D355A-5 Bulldozer Shop Manual SEBM01950508 – PDF DOWNLOAD
MACHINE MODEL SERIAL NUMBER
D355A-5 12622 and up
Description
Komatsu D355A-5 Bulldozer Shop Manual SEBM01950508 – PDF DOWNLOAD
FILE DETAILS:
Komatsu D355A-5 Bulldozer Shop Manual SEBM01950508 – PDF DOWNLOAD
Language : English
Pages : 723
Downloadable : Yes
File Type : PDF
IMAGES PREVIEW OF THE MANUAL:
TABLE OF CONTENTS:
Komatsu D355A-5 Bulldozer Shop Manual SEBM01950508 – PDF DOWNLOAD
MACHINE MODEL SERIAL NUMBER
D355A-5 12622 and up
COVER 1
CONTENTS 2
SAFETY 7
FOREWORD 9
HOW TO READ THE SHOP MANUA; 10
HOISTING INSTRUCTIONS 11
COATING MATERIALS 12
STANDARD TIGHTENING TORQUE 13
ELECTRIC WIRE CODE 15
CONVERSION TABLE 16
TEMPERATURE 21
WEIGHT TABLE 23
TABLE OF FUEL, COOLANT AND LUBRICANTS 25
10 STRUCTURE AND FUNCTION 29
GENERAL 30
POWER TRAIN HYDRAULIC CIRCUIT DIAGRAM 32
TORQUE CONVERTER 34
TORQFLOW TRANSMISSION 37
DISC CLUTCHES 39
TRANSMISSION POWER TRAIN 40
TORQFLOW HYDRAULIC PIPING 46
TORQFLOW HYDRAULIC SYSTEM 48
TORQFLOW HYDRAULIC CIRCUIT DIAGRAM 49
TRANSMISSION CONTROL VALVE 50
CONTROL VALVE SYSTEM DIAGRAM 52
SAFETY VALVE 55
TRANSMISSION LUBRICATION RELIEF VALVE 56
TRANSMISSION PUMP 57
TRANSMISSION AND STEERING OIL STRAINER 58
TRANSMISSION OIL FILTER 59
BEVEL GEAR SHAFT AND STEERING CLUTCH 60
STEERING AND BRAKE PIPING 62
STEERING AND BRAKE HYDRAULIC SYSTEM 64
STEERING AND BRAKE HYDRAULIC CIRCUIT DIAGRAM 65
STEERING CONTROL VALVE 66
STEERING MAIN RELIEF VALVE 71
STEERING BRAKE AND BOOSTER 72
STEERING PUMP 76
STEERING OIL FILTER 77
SPRING ASSIST BRAKE DEVICE 78
PTO 82
FINAL DRIVE 84
TRACK FRAME 86
RECOIL SPRING 87
IDLER 88
TRACK ROLLER AND CARRIER ROLLER 89
TRACK (Lubricated track link) 90
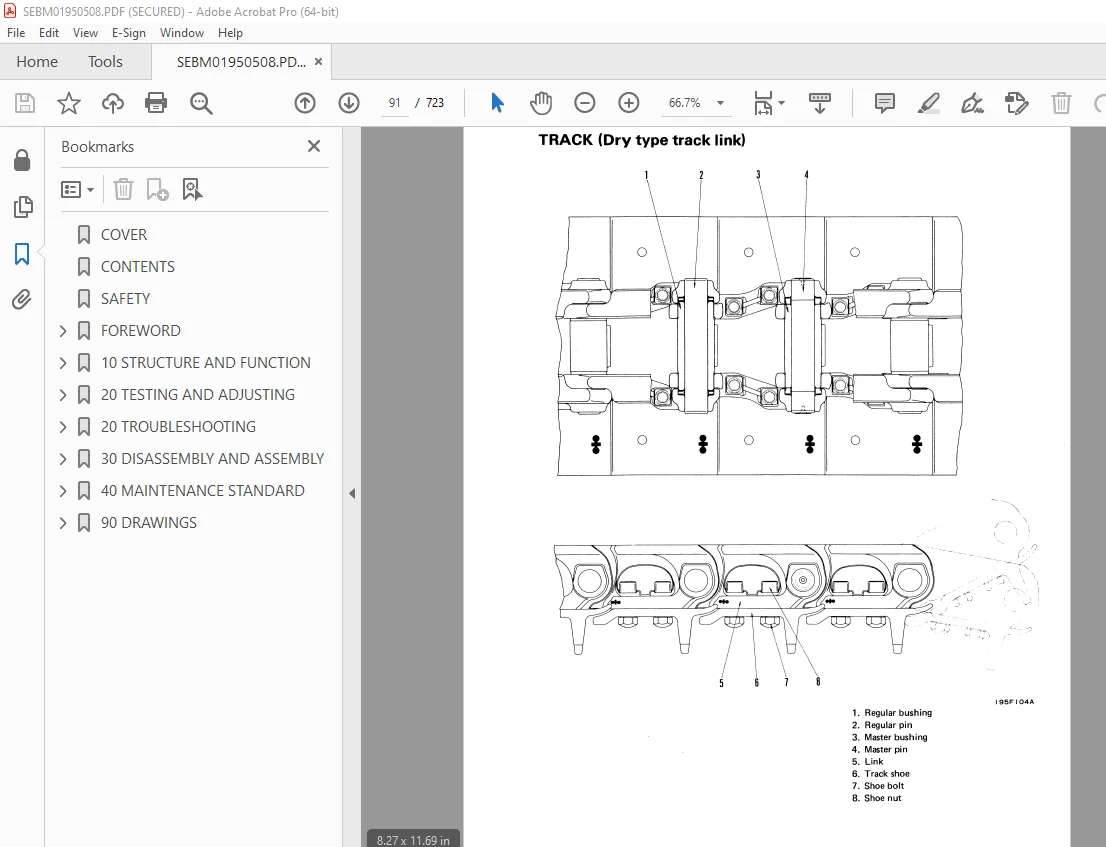
TRACK (Dry type track link) 91
SUSPENTION 92
HYDRAULIC PIPING 94
HYDRAULIC CIRCUIT DIAGRAM 99
HYDRAULIC TANK 100
HYDRAULIC PUMP 101
HYDRAULIC CONTROL VALVE 102
HYDRAULIC CYLINDER 106
RIPPER SELECTOR VALVE AND PILOT CHECK VALVE 110
PILOT VALVE 114
SERVO VALVE HYDRAULIC SYSTEM 115
ROTARY SERVO VALVE 116
PIN PULLER HYDRAULIC SYSTEM AND DIAGRAM (for giant ripper) 120
PIN PULLER VALVE (for giant ripper) 121
PIN PULLER CYLINDER (for giant ripper) 124
STRAIGHT TILT DOZER 126
VARIABLE MULTIPLE SHANK RIPPER 128
VARIABLE GIANT RIPPER 129
CYLINDER STAY 130
EVMS (electronic vehicle monitoring system0 131
AIR CONDITIONER 138
20 TESTING AND ADJUSTING 142
TABLE OF STANDARD VALUES FOR ENGINE 143
TABLE OF STANDARD VALUES FOR CHASSIS 144
TABLE OF ELECTRICAL JUDGEMENT STANDARD VALVE 150
TESTING AND ADJUSTING TOOL LIST 151
ADJUSTING VALUE CLEARANCE 152
MEASURING COMPRESSION PRESSURE 153
ADJUSTING FUEL INJECTION TIMING 154
MEASURING TORQUE CONVERTER STALL SPEED 155
MEASURING HYDRAULIC PRESSURE 156
BLEEDING AIR FROM HYDRAULIC CYLINDER 158
ADJUSTING LINKAGE 159
ADJUSTING GEAR SHIFT LEVER LINKAGE 161
ADJUSTING STEERING CONTROL LINKAGE 163
ADJUSTING TRAVEL OF BRAKE LINKAGE 164
ADJUSTING BRAKE PEDAL LINKAGE 165
ADJUSTING SPRING ASSIST BRAKE 166
ADJUSTING BLADE CONTROL LINKAGE 167
ADJUSTING RIPPER CONTROL LINKAGE 168
TROUBLESHOOTING 170
SEQUENCE OF EVENTS IN TROUBLESHOOTING 171
CHECKS BEFORE TROUBLESHOOTING 172
POINTS TO REMEMBER WHEN TROUBLESHOOTING 173
PREVENTING RECURRENCE OF THE SAME TROUBLE 174
PRECAUTIONS WHEN CARRYING OUT MAINTENANCE 175
HANDLING CONNECTORS 182
METHOD OF READING TROUBLESHOOTING TABLE 183
METHOD OF USING TROUBLESHOOTING CHARTS 185
LOCATION OF CONNECTORS FOR TROUBLESHOOTING 189
CONNECTION TABLE FOR CONNECTOR PIN 190
TROUBLESHOOTING OF HYDRAULIC AND MECHANICAL SYSTEM 198
H-1 Torque converter oil temperature too high 199
H-2 Machine does not move off 201
H-3 Machine lacks power or speed 203
H-4 Machine moves when engine is started 204
H-5 Excessive time lag when starting machine or shifting gear 204
H-6 Excessive shock when starting machine or shifting gear 205
H-7 Machine travels in one direction only (FORWARD OR REVERSE) 205
H-8 Steering clutch does not disengage 206
H-9 Steering clutch slips 207
H-10 Steering brake does not work 208
H-11 Blade lift lacks power and speed 209
H-12 Blade does not lift 210
H-13 The front of machine cannot be raised off ground by the blade 211
H-14 Hydraulic drift of lift cylinder is large 212
H-15 Blade moves unsteadily when leveling the ground 213
H-16 Blade lowers under the following conditions 213
H-17 Travel of the piston rods in the right and left lift cylinders is diffferent 213
H-18 Blade tilting force is lack, blade tilting speed is slow, the machine cannot be raised off the ground by blade tilting force 214
H-19 Tilt cylinder does not move off (Tilting is impossible) 215
H-20 Hydraulic drift of tilt cylinder is large 216
H-21 Hydraulic drift of ripper cylinder is large 217
H-22 Control lever operating force is heavy 218
TROUBLESHOOTING OF ELECTRICAL SYSTEM 220
TABLE OF FAILURE MODES AND CAUSES 221
E-1 Even when preheating switch is turned on, APS pilot lamp on monitor panel does not light up 223
Related electrical circuit diagram 225
E-2 When preheating switch is turned on, APX pilot lamp on monitor panel light up, but it doesn’t go out, or the time taken for it to go out is not 60 – 100 sec 227
E-2 Related electrical circuit diagram 228
E-3 Even when engine is granked, it does not start 229
Related electrical circuit diagram 231
E-4 APS control unit does not work properly 233
TROUBLESHOOTING OF MACHINE MONITOR SYSTEM 236
TABLE OF FAILURE MODES AND CAUSES 237
M-1 No Monitor panel display is given when starting switch is turned ON 238
M-2 When starting switch is turned ON, alllamps on monitor panel stay lighted and do not go out 238
M-3 When starting switch is ON (Engine stopped), check items flash 239
M-4 No preheating is being carried out, but preheating display lights up 240
M-5 When starting switch is turned ON and engine is started, check items flash 241
M-6 When starting switch is turned ON (Engine stopped), caution items flash 242
M-7 When starting switch is turned ON (Engine started), caution items flash 243
M-8 When starting switch is turned ON (Engine stopped), buzzer does not sound for one second 245
M-9 When starting switch is turned ON (Engine stopped), caution lamp does not light up for 2 seconds 246
M-10 Panel lighting of monitor panel does not light up (Liquid crystal display is normal) 247
M-11 Service meter does not move after engine is started 248
M-12 Engine coolant temperature gauge shows abnormally low temperature 249
M-13 Engine coolant temperature gauge gives no display 249
M-14 Torque converter oil temperature gauge shows abnormally low temperature 250
M-15 Torque converter oil temperature gauge gives no display 250
M-16 Fuel gauge always displays tank full 251
M-17 Fuel gauge gives no display 251
20 TROUBLESHOOTING 252
Preparation for Troubleshooting 252
Position of connectors 253
30 DISASSEMBLY AND ASSEMBLY 259
Method of Using Manual 263
Precautions when carrying out operation 265
Dismounting / Mounting of Starter Motor 268
Removing / Installing of Fan Belt 269
Dismounting / Mounting of Alternator 270
Dismounting / Mounting of engine Oil Cooler 272
Dismounting / Mounting of Fuel Injection 276
Dismounting / Mounting of Water Pump 280
Dismounting / Mounting of Turbo Charger 284
Dismounting / Mounting of After Cooler 288
Dismounting / Mounting of Nozzle Holder 294
Dismounting / Mounting of Cylinder Head 296
Dismounting / Mounting of Radiator 308
Dismounting / Mounting of Fuel Tank 312
Dismounting / Mounting of PTO 314
Dismounting / Mounting of Torque Converter Oil Cooler 318
Dismounting / Mounting of Engine 324
Dismounting / Mounting of Chassis-Related Parts from Engine 336
Dismounting / Mounting of Torque Converter 340
Disassembly / Assembly of Torque Converter 344
Dismounting / Mounting of Torque Converter Relief Valve 358
Dismounting / Mounting of Torque Converter Regulator Valve 359
Dismounting / Mounting of Torqflow Transmission 360
Disassembly / Assembly of Torqflow Transmission 370
Disassembly of No 1,3 Carriers and No 1,2 Sun gears and bearing cage 379
Disassembly of No 4 Housing and No 5,6 Gears and PTO Shaft 382
Assembly of Torqflow Transmission 386
Assembly of No 4 Housing and No 5,6 Gears and PTO Shaft 386
Assembly of No 1,2 Sun Gears and Bearing Cage 390
Dismounting / Mounting of Torqflow Transmission Lubrication Valve 404
Dismounting / Mounting of Transmission Control Valve 405
Dissambly / Assembly of Transmission Control Valve 406
Dismounting / Mounting of Steering Clutch 414
Disassembly / Assembly of Steering Clutch 420
Dismounting / Mounting of Bevel Gear Shaft and Bevel Gear 424
Dismounting / Mounting of Steering / Brake Interlocking Valve 432
Disassembly / Assembly of Steering / Brake Interlocking Valve 434
Disassembly / Assembly of Steering Bake Booster 436
Dismounting/ Mounting of Steering Main Relief Valve 440
Disassembly / Assembly of Steering Main Relief Vallve 440
Dismounting / Mounting of Brake Assister Cylinder Ass’y 441
Disassembly / Assmebly of Brake Assister Cylinder Ass’y 442
Dismounting / Mounting of Final Drive 1st Pinion 448
Disassembly / Assembly of Final Drive 454
Dismounting / Mounting of Transmission Pump 470
Dismounting / Mounting of Steering Pump 471
Checking before removal of Track Shoe Assembly 472
Removal of Track Shoe Assembly (Normal) 473
Removal of Track Shoe Assembly (When there is abnormality inside track frame) 474
Installation of Track Shoe Assembly 475
Truck Line Disassembly and Assembly 476
Overall Disassembly / Assembly of Track Shoe 480
Press-Fitting Jig Dimension Table for Link Press 500
Field Disassembly / Assembly of One link 501
Disassembly / Assembly of Master Link 505
Dismounting / Mounting of Carrier Roller 510
Dismounting / Mounting of Track Roller 512
Dismounting / Mounting of Idler 516
Removal / Installation of Recoil Spring 520
Disassembly / Assembly of Recoil Spring 524
Dismounting / Mounting of Track Frame 530
Dismounting / Mounting of Ripper and Blade Control Valve 534
Disassembly / Assembly of Ripper and Blade Control Valve 540
Dismounting / Mounting of Blade Tilt Control Valve 546
Disassembly / Assembly of Blade Tilt Control Valve 550
Dismounting / Mounting of Hydraulic Pump 551
Dismounting / Mounting of Ripper and Blade Servo Valve 552
Dismounting / Mounting of Blade Tilt Servo Valve 556
Dismounting / Mounting of Pin Puller Valve 558
Dismounting / Mounting of Ripper Selector Control Valve 562
Dismounting / Mounting Ripper Selector Valve 564
Disassembly / Assembly of Ripper Selector Valve 570
Dismounting / Mounting of Blade Lift Cylinder 578
Disassembly / Assembly of Blade Lift Cylinder 580
Dismounting / Mountain of Blade Tilt Cylinder 590
Disassembly / Assembly of Blade Tilt Cylinder 592
Dismounting / Mounting of Ripper Lift Cylinder 602
Dismounting / Mounting of Ripper Tilt Cylinder 604
Disassembly / Assembly of Ripper Cylinder 606
Dismounting / Mounting of Pin Puller Cylinder 616
Dismounting / Mounting of Blade 618
Disassembly / Assembly of Blade 622
Disassembly / Assembly of Variable Giant Ripper 628
Dismounting / Mounting of Floor Frame 636
Dismounting / Mounting of Rops Cab 642
Tilting / Returning of Rops Cab 648
40 MAINTENANCE STANDARD 656
Transmission Pump 657
Steering Pump 658
Torque Converter 659
Transmission Lubrication Relief Valve 662
Torqflow Transmission 663
Transmission Control Valve 665
Bevel Gear Shaft 667
Steering Clutch 669
Steering Control Valve 671
Steering Main Relief Valve 673
Brake Assister Turomatic Drain Valve 674
Brake Assister Check Valve 675
Spring Assist Brake Cylinder 676
Spring Assist Brake Auto Drain Valve 677
Steering Brake and Booster 679
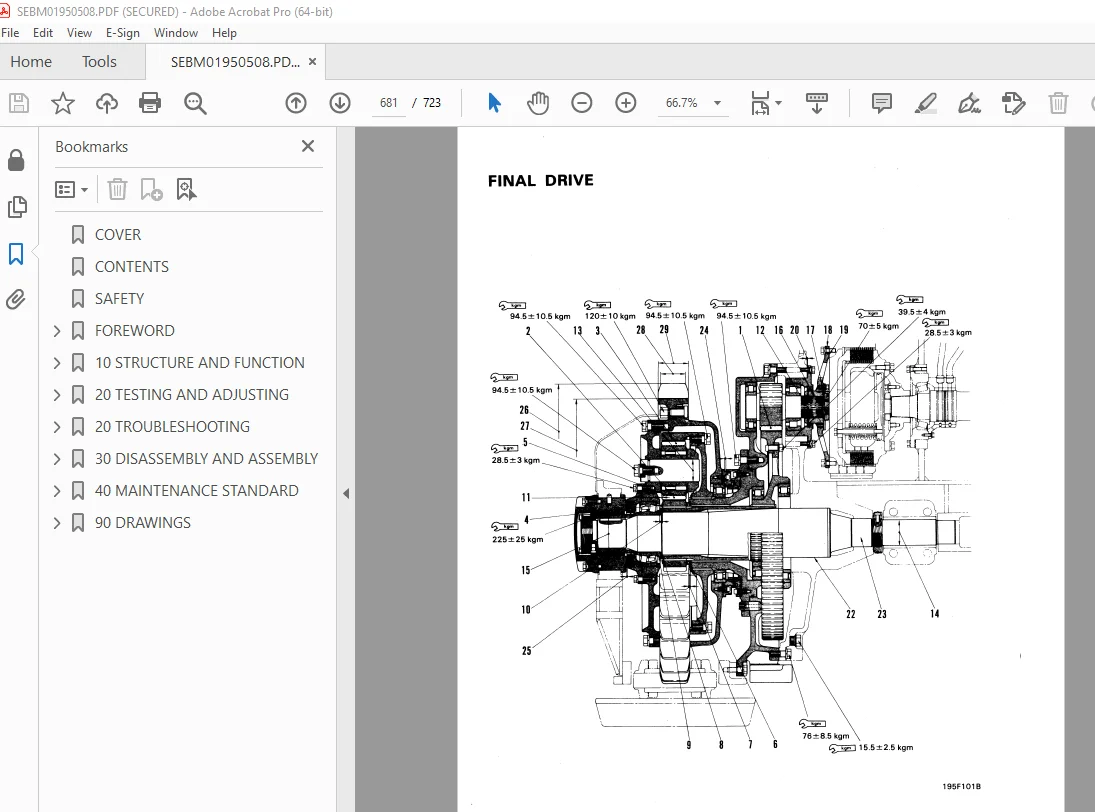
Final Drive 681
Track Frame 685
Recoil Spring 686
Idler 687
Track Roller 689
Carrier Roller 691
Track Shoe (Lubricated track link) 693
Track (Dry type track link) 695
Hydraulic Pump 697
Hydraulic Control Valve 698
Quike Drop Valve 701
Ripper Selector Valve and Pilot check Valve 702
Ripper Pilot Valve 703
Ripper Pin Puller Valve (for Giant Ripper) 704
Hydraulic Cylinder 705
Pin Puller Cylinder (for Giant Ripper) 707
Servo Valve 708
Straight Tilt Dozer 709
Cylinder Stay 710
Variable Multiple Shank Ripper 711
Variable Giant Ripper 713
90 DRAWINGS 716
ELECTRICAL CIRCUIT DIAGRAM 719
Chassis Electrical Circuit 719
Cab Electrical Circuit 720
Related Electrical Circuit 721
APS System 721
Monitor System 722
LOCATION OF CONNECTORS 723
DESCRIPTION:
Komatsu D355A-5 Bulldozer Shop Manual SEBM01950508 – PDF DOWNLOAD
MACHINE MODEL SERIAL NUMBER
D355A-5 12622 and up
GENERAL PRECAUTIONS :
Mistakes in operation are extremely dangerous. Read the OPERATION & MAINTENANCE MANUAL carefully BEFORE operating the machine.
PREPARATIONS FOR WORK:
PRECAUTIONS DURING WORK :
S.V 29/12/24