Trusted Business
Verified & Licensed
Virus Free Files
100% Safe Downloads
Secure Payment
SSL Protected
Instant Delivery
Available Immediately
Daihatsu Feroza F300 HD-ENGINE Appendix Workshop Manual – PDF DOWNLOAD
$29.95
Daihatsu Feroza F300 HD-ENGINE Appendix Workshop Manual – PDF DOWNLOAD
Instant PDF Download
Available immediately
Save to Your Device
Download & keep forever
Antivirus Scanned
100% virus-free
Trusted Worldwide
175,000+ customers
Description
Daihatsu Feroza F300 HD-ENGINE Appendix Workshop Manual – PDF DOWNLOAD
FILE DETAILS:
Daihatsu Feroza F300 HD-ENGINE Appendix Workshop Manual – PDF DOWNLOAD
Language : English
Pages : 440
Downloadable : Yes
File Type : PDF
IMAGES PREVIEW OF THE MANUAL:
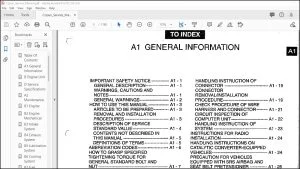
TABLE OF CONTENTS:
Daihatsu Feroza F300 HD-ENGINE Appendix Workshop Manual – PDF DOWNLOAD
GENERAL INFORMATION GI
MAINTENANCE MA
ENGINE MECHANICALS EM
EMISSION CONTROL SYSTEMS EC
EFI SYSTEM EF
FUEL SYSTEM FU
COOLING SYSTEM CO
LUBRICATION SYSTEM LU
IGNITION SYSTEM IG
STARTING SYSTEM ST
CHARGING SYSTEM CH
SST A
SERVICE SPECIFICATIONS B
TIGHTENING TORQUE C
WIRING DIAGRAM D
DESCRIPTION:
Daihatsu Feroza F300 HD-ENGINE Appendix Workshop Manual – PDF DOWNLOAD
FOREWORD:
- This workshop manual describes the maintenance and servicing proce- dures for Type HD engines which are mounted on the Daihatsu F300.
- In this workshop manual, the entire portion is divided into 11 sections and four supplements. Each section has an index along with a table of contents at the beginning. For easier reference, the upper part of each page bears the section title concerned.
- All information used in this workshop manual was in effect at the time when the manual was approved for printing. However, the specifications and pro- cedures may be revised due to the continuing improvements in the design without advance notice and without incurring any obligation to us.
GENERAL SERVICE INSTRUCTIONS:
1. Use fender covers:
1. Use fender covers:
- seat covers or floor sheets so that the vehicle may not get dirty or be scratched.
2. Jacking up:
(1) When only the front section or rear section of the vehicle is jacked up, be sure to place chocks at the wheels so as to insure safe operations.
(2) When the vehicle has been jacked up, be sure to support the vehicle at the specified section using safety stands. (See page GI-9)
(1) When only the front section or rear section of the vehicle is jacked up, be sure to place chocks at the wheels so as to insure safe operations.
(2) When the vehicle has been jacked up, be sure to support the vehicle at the specified section using safety stands. (See page GI-9)
3. Handling instructions related to battery:
(1) Before you start performing the electrical works, make certain to disconnect the battery cable from the negative (-) terminal of the battery.
(2) When it becomes necessary to disconnect the battery cables for the purpose of carrying out checks or repairs, always start at the negative (-) battery terminal which is grounded to the body.
(3) To avoid damaging the battery plates, after the terminal nut has been loosened, pull out the battery cable straight upward, rather than turning or prying the terminal.
(4) Clean the battery terminal posts or cable terminals, using a cloth. Never use a file or other adhesive agents.
(5) When connecting the cable terminal to the battery, first the cable terminal should be fitted onto the bat- tery post with the attaching nut in a loose state. Then, tighten the nut. Never tap the terminal onto the battery post, using a hammer.
(6) As for the cover at the positive (+) terminal side, be sure to install it at the correct position.
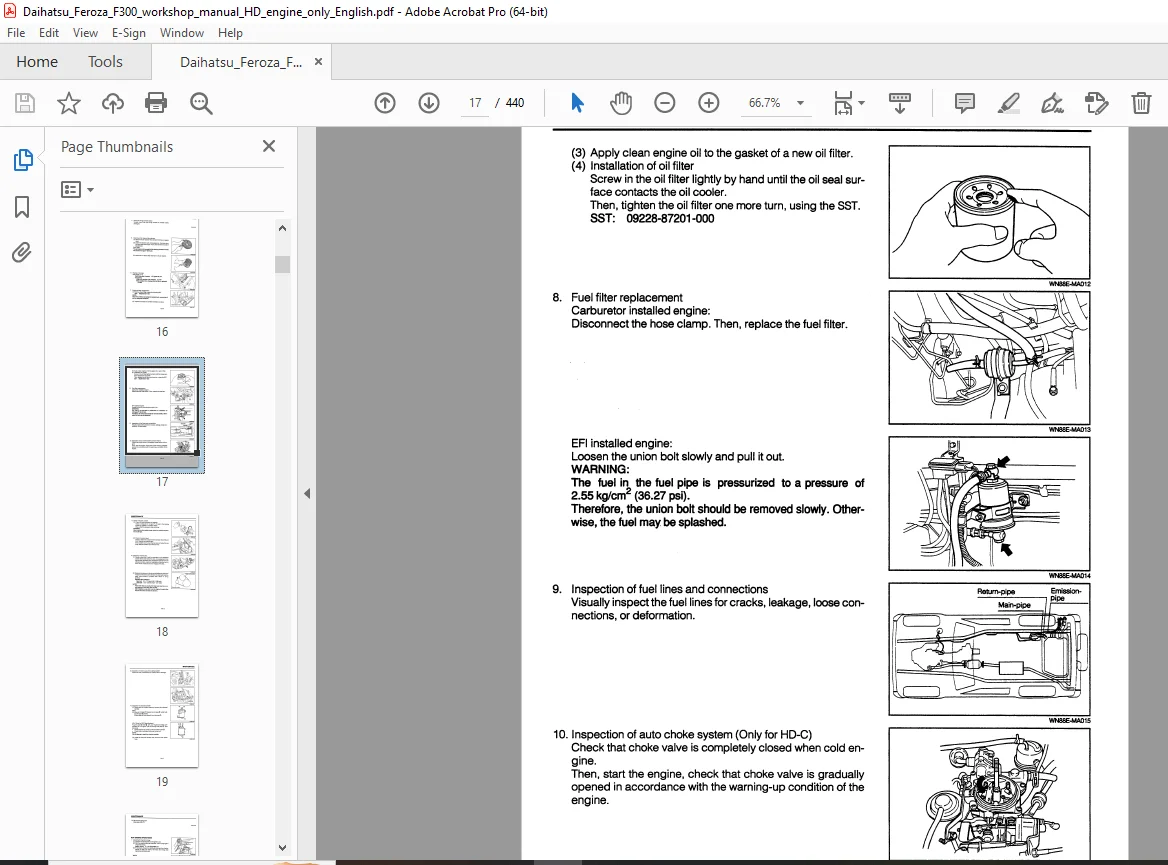
4. Repairing of fuel system:
Type HD-E engine employs a high fuel pressure. Therefore, the following notes should be observed.
(1) Before you start performing the electrical works, make certain to disconnect the battery cable from the negative (-) terminal of the battery.
(2) When it becomes necessary to disconnect the battery cables for the purpose of carrying out checks or repairs, always start at the negative (-) battery terminal which is grounded to the body.
(3) To avoid damaging the battery plates, after the terminal nut has been loosened, pull out the battery cable straight upward, rather than turning or prying the terminal.
(4) Clean the battery terminal posts or cable terminals, using a cloth. Never use a file or other adhesive agents.
(5) When connecting the cable terminal to the battery, first the cable terminal should be fitted onto the bat- tery post with the attaching nut in a loose state. Then, tighten the nut. Never tap the terminal onto the battery post, using a hammer.
(6) As for the cover at the positive (+) terminal side, be sure to install it at the correct position.
4. Repairing of fuel system:
Type HD-E engine employs a high fuel pressure. Therefore, the following notes should be observed.
(1) When the union bolt is removed take a measure to prevent the fuel from splashing with a cloth or the like. Slacken the union bolt gradually.
(2) Tighten each connecting section to the specified torque.
(3) Attach the specified clip to each connecting section.
5. For increased work:
(2) Tighten each connecting section to the specified torque.
(3) Attach the specified clip to each connecting section.
5. For increased work:
- efficiency and improved accuracy, be sure to utilize the SSTs (Special Service Tools) effectively.
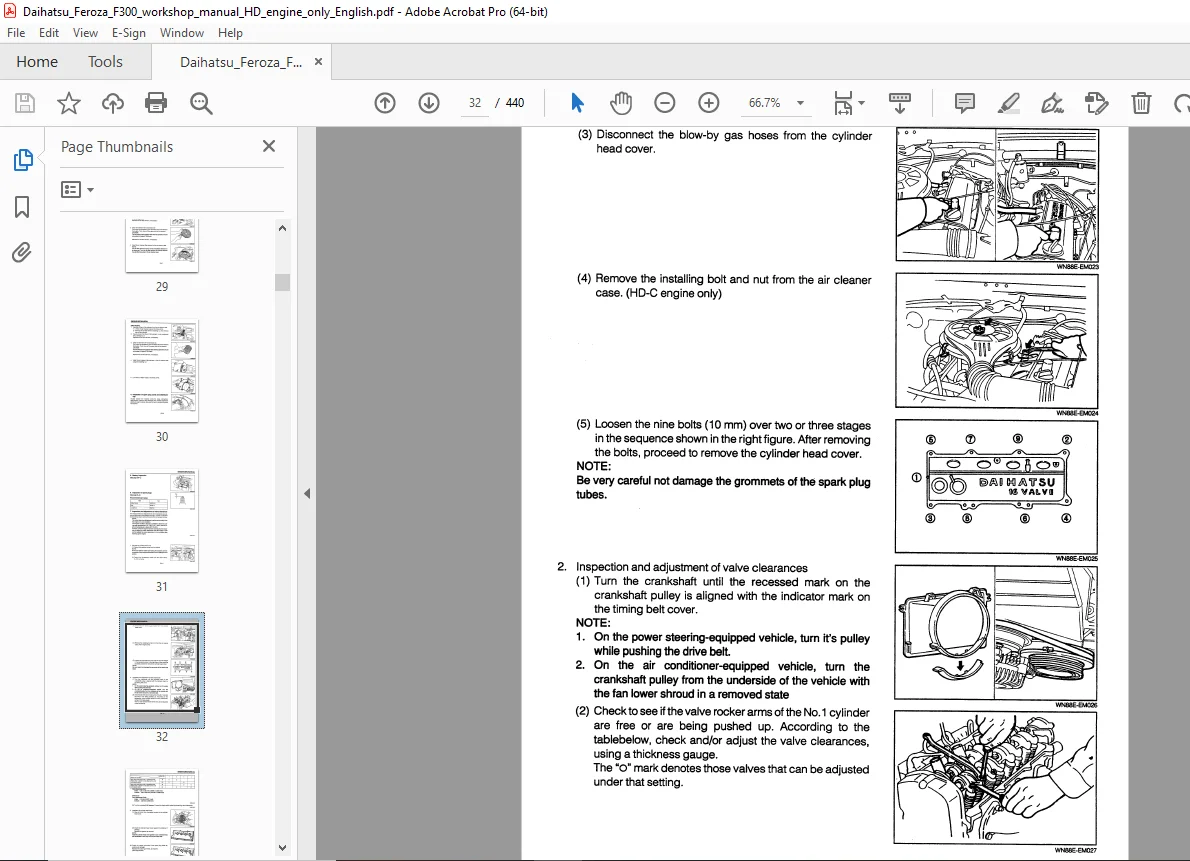
6. Removal and disassembly:
(1) When disassembling complicated components, put stamped marks or mating marks on those sections where such marks do not affect their functions so that the assembling operation may be performed easily.
(2) Each time a part removed, check the part for the assembled condition, deformation, breakage, rough- ness and scratches.
(3) Arrange the disassembled parts in the disassembling order. In addition, separate and arrange those parts to be replaced and those parts to be reused.
(4) Thoroughly clean and wash those parts to be reused.
(5) Inspection and measurement of part
Perform thorough inspection and measurement on those parts to be reused, as required.
7. Installation and assembly:
(1) Assemble those satisfactory parts, following the proper procedure and specified standards. (adjust- ing values and tightening torque, etc.)
(2) Ensure that seal packings and grease are applied to those sections where such application is needed. (3) Be sure to use new packings, gaskets, cotter pins and so forth.
(4) Ensure that the specified bolts and nuts only be used. Moreover, where specified, make sure to employ a torque wrench to tighten bolts and nuts to the specified torque.
Make sure to use only genuine parts for every replacement.
G.B 22/02/25